
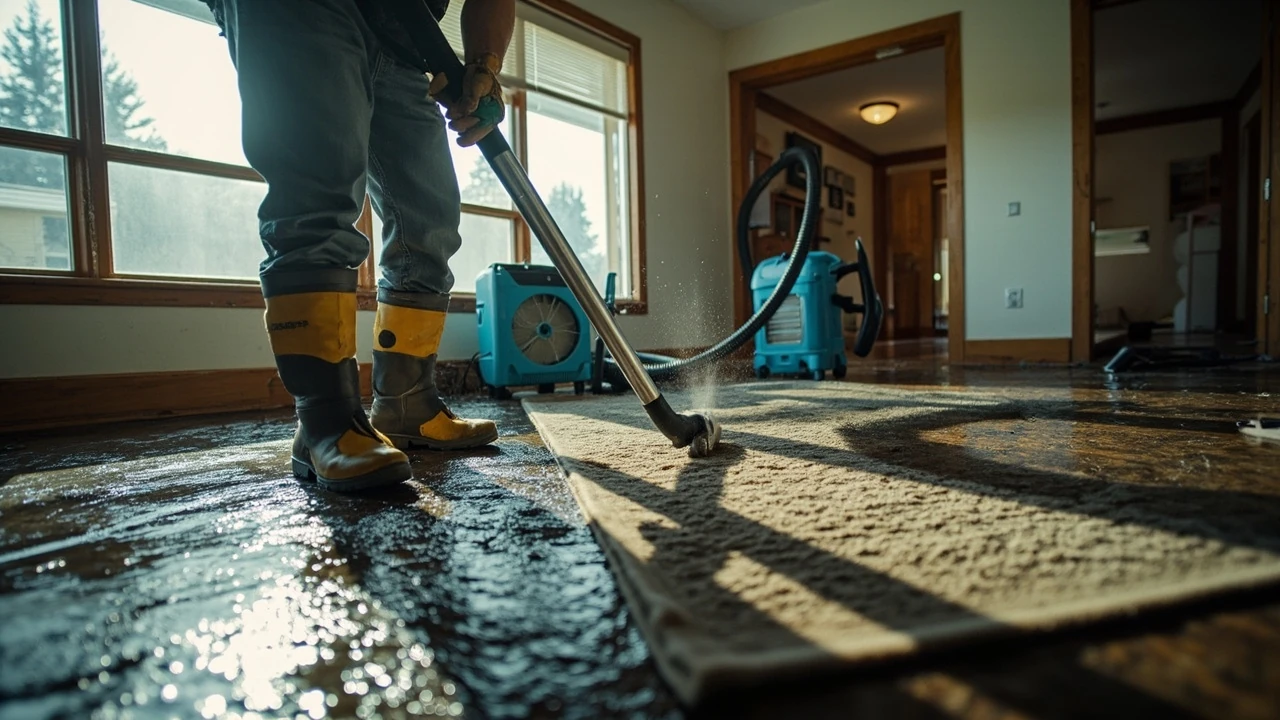

Water clean up at home: what every U.S. homeowner should know
A burst supply line at 2 a.m., a washing-machine hose that lets go while you are at work, a sump pump that fails during a summer storm — these are the moments when water clean up suddenly becomes the most important project in the house. The first 24 to 48 hours decide whether a soaked room dries out cleanly or turns into a mold problem that costs several thousand dollars to remediate. Knowing what to do, in what order, and what to leave to a professional makes the difference between a hard week and a drawn-out insurance claim.
This guide walks U.S. homeowners through the practical side of residential water clean up: how to classify the water, which steps to take in the first hour, how to dry the structure properly, when mold becomes a real concern, and what to expect from a restoration company. It is written for owner-occupied houses, condos, and small multi-family properties — the buildings most people actually live in — and it avoids both alarmism and the false reassurance that a fan and a shop vac will always be enough.
Why the first 24 hours matter so much
Water damage is one of the few household problems where time has a measurable cost. Porous materials such as drywall, carpet padding, and engineered wood absorb moisture quickly. Within hours, that moisture starts wicking up walls and under baseboards. Within a day or two, mold spores that are always present in indoor air find a damp surface and begin colonizing it. Within a week, a localized leak can turn into a whole-room tear-out.
Restoration professionals use a concept often called the “48-hour rule”: if materials are dried and sanitized within about two days, most damage stays cosmetic. After that, the risk of hidden mold, structural swelling, and lingering odors climbs sharply. The federal cleanup guidance issued after major U.S. floods and the standard procedures followed by certified restoration firms are both built around this window, so a homeowner’s real job during water clean up is to compress the timeline as much as safely possible.
Step 1: confirm safety before you touch anything
Before grabbing a mop, take a slow look around the affected area. Water and electricity are a dangerous combination, and a wet floor is a slip hazard even in a familiar room.
- If standing water is anywhere near outlets, appliances, or your electrical panel, do not step into it. Go to the breaker box and shut off power to the affected circuits. If you cannot reach the panel safely, call your utility or an electrician.
- If water has reached a gas appliance such as a water heater or furnace, do not relight pilot lights or restart the unit until it has been inspected.
- Check for sagging ceilings. A water-loaded drywall or plaster section can collapse without warning.
- Wear waterproof boots or shoes, rubber gloves, and an N95 or similar mask if you are handling visibly contaminated water or visible mold.
- Keep children and pets out of the work area until it is clean and dry.
These steps feel basic, but emergency-room data from the Consumer Product Safety Commission repeatedly show that electrocution and falls are leading causes of injury during home flood events, and both are largely preventable with a calm first pass.
Step 2: find and stop the source
Drying a room without stopping the source is wasted effort. Before you call anyone, trace the water back to where it is coming from.
| Common source | What to do first | Typical fix |
|---|---|---|
| Burst supply line to a faucet or toilet | Shut the local angle stop, then the main water valve | Replace the line and/or fixture; inspect for water spread |
| Washing machine or dishwasher hose failure | Close the hot/cold valves behind the appliance | Replace hoses with braided stainless lines; test before reuse |
| Water heater leak | Turn off the cold supply and the gas or electric power to the unit | Replace the heater; check the pan drain and floor for damage |
| Roof leak from storm damage | Place a tarp or bucket to control interior drip | Roof patch or replacement, then interior drying |
| Sump pump failure | Check the pump, float switch, and discharge line for blockage | Repair or replace pump; consider a battery backup |
| Sewer backup or floor-drain overflow | Stop using plumbing and avoid the area | Professional extraction and disinfection; possible main-line service |
| Foundation seepage during heavy rain | Move valuables; document with photos | Exterior grading, sump, or drain-tile work after drying |
If the source is a plumbing failure inside your home, your homeowner’s insurance typically covers the resulting damage but not the cost of repairing the broken pipe itself. If the source is a sewer backup, you usually need a specific sewer-and-drain rider for any of the clean up to be covered at all. Reading your policy before a crisis is a lot less stressful than reading it during one.
Step 3: document the damage for insurance
Once the area is safe, pick up your phone and start a record. Insurers expect a clear before-and-after story, and the photographs you take in the first hour are often the most useful ones in the entire claim.
- Shoot wide shots of each affected room, then medium shots of each wall, and close-ups of damaged materials.
- Record video with audio; narrate the date, time, and what you are seeing.
- Save any receipts for emergency supplies, plumber visits, or equipment rentals; insurers commonly reimburse these under “mitigation” expenses.
- Do not throw away soaked carpet, padding, or baseboards until an adjuster has seen them or until you have been told it is okay to do so.
One detail that often gets missed: if you have to move out because the home is uninhabitable, keep records of additional living expenses such as hotel stays, pet boarding, and extra mileage. These are usually covered separately from the repair cost, but only if you can show the costs.
Step 4: classify the water
Not all water clean up is the same. Restoration professionals sort water into three categories, and the category drives the safety approach, the disposal rules, and the price tag.
| Category | Source examples | What it means for clean up |
|---|---|---|
| Category 1 — clean | Supply line, faucet, water heater, rain through a clean roof | Lowest risk; can often be handled by homeowners if the area is small and dries quickly |
| Category 2 — gray | Washing-machine overflow, dishwasher leak, toilet overflow with no solid waste | Contains some contaminants; porous materials usually discarded; disinfect all surfaces |
| Category 3 — black | Sewer backup, floodwater from rivers or storm surge, water with visible mold or sewage | High health risk; professional extraction, controlled demolition, and full disinfection required |
The U.S. Environmental Protection Agency, which administers the federal framework for surface-water quality through legislation such as the Clean Water Act, treats any water that has contacted sewage, soil, or outdoor floodwater as potentially hazardous. Treat unknown water the same way: as if it were the worst category you might have, then let testing or a professional opinion downgrade it.
Step 5: extract standing water
Extraction has to happen before drying. Every gallon you pull out with a pump or wet vac is a gallon you do not have to evaporate later, and evaporation is slow. A typical household dehumidifier can pull only a few gallons per day from the air, while a small submersible pump can move the same amount in minutes.
- For a small spill under a sink, a wet/dry shop vacuum and a stack of old towels are usually enough.
- For a room with more than an inch or two of water, a rented submersible pump or a restoration company’s truck-mounted extractor is far faster and more effective.
- Pull up soaked carpet and padding as soon as the area is safe. Padding dries poorly and holds water against the subfloor, which is the most common reason for hidden mold after a clean-looking carpet has been “saved.”
- Remove baseboards only if water has wicked noticeably up the drywall; a drywall cut at 12 to 24 inches above the waterline is the standard drying access in the industry.
If extraction will take more than a few hours, the smartest move is often to call a professional. Most restoration companies offer free or low-cost emergency extraction, and the cost is usually covered under mitigation in an insurance claim.
Step 6: dry the structure
Once standing water is gone, the building itself is still wet. Wood framing can hold a surprising amount of moisture, and concrete slabs act like slow-release sponges, so drying has to be deliberate rather than passive.
Three pieces of equipment do the bulk of the work:
- Air movers — high-velocity fans that push moist air off wet surfaces and replace it with drier air.
- Dehumidifiers — refrigerant or desiccant units that pull moisture out of the air so the air movers can pick up more.
- Heat (in cooler weather) — modest warmth speeds evaporation without baking the finishes.
A good target for a dried room is a relative humidity of 30 to 50 percent in the affected area, with moisture-meter readings in framing and subfloor back to normal levels for the material. Restoration technicians use pin and pinless meters to track this; homeowners can buy a basic pinless meter at a hardware store for a few dozen dollars and use it to spot-check.
Expect drying to take three to five days for a single-room Category 1 event, and a week or more for a multi-room Category 2 or 3 job. Resist the urge to close up the room and paint over any discoloration before the meter confirms the materials are truly dry. Trapped moisture will push paint off the wall and feed mold behind it.
Step 7: clean and disinfect
After drying, the goal is to leave a clean, sanitary surface behind. For Category 1 water, a vacuum with a HEPA filter, a damp wipe-down, and normal household cleaners are usually enough. For For additional context, Category 2 and 3 water, every affected surface should be cleaned with a disinfectant appropriate to the contaminant — commonly an EPA-registered antimicrobial or a diluted bleach solution for non-porous surfaces.
Soft goods are a special case. Items soaked by clean water can often be laundered or professionally cleaned. Items soaked by gray or black water are almost always discarded, because bacteria and other contaminants soak into fibers faster than they can be washed out. Upholstered furniture, mattresses, and pillows usually fall into the “discard” group for anything beyond a small, easily cleaned Category 1 event.
When mold enters the picture
Mold is the part of water clean up that worries homeowners the most, and for good reason. The Centers for Disease Control and Prevention notes that mold can begin growing on wet materials within 24 to 48 hours and that there is no practical way to eliminate every mold spore from a home — the goal is to keep indoor moisture low enough that spores cannot colonize.
The signs are familiar: a musty smell that does not go away, dark or fuzzy spots on drywall or trim, peeling paint, and recurring allergy-like symptoms when you spend time in the room. A small spot (under about 10 square feet) on a hard, non-porous surface is often a reasonable DIY project: fix the moisture source, clean with detergent, dry thoroughly, and monitor. Larger areas, hidden mold behind walls, and any mold that returns after cleaning are signals to bring in an indoor-air-quality or remediation professional who can contain the work area, run negative-pressure air scrubbers, and remove contaminated material safely.
How much does professional water clean up cost?
Costs vary widely by region, water category, and how long the water sat before extraction, but a few rough ranges are useful for budgeting and for sanity-checking an insurance estimate.
| Scope of work | Typical U.S. price range | Notes |
|---|---|---|
| Single room, Category 1, dried within 24 hours | $500 to $1,500 | Often the floor for a small, fast response |
| Multiple rooms or basement, Category 1 or 2 | $2,000 to $6,000 | Includes extraction, drying equipment, and monitoring |
| Sewer or floodwater event, partial demolition | $5,000 to $15,000+ | Controlled demolition, antimicrobial treatment, full drying cycle |
| Mold remediation after water damage | $1,500 to $8,000+ | Priced per affected square foot, separate from the water job |
These figures are ballpark, not quotes. Every job is site-specific, and the line between “restoration” and “reconstruction” — replacing drywall, flooring, cabinets, and paint — adds another layer of cost. Insurance policies usually separate the two: dwelling coverage pays to restore the structure, while contents coverage pays to clean or replace damaged belongings. Reviewing both before a loss helps avoid surprises.
Choosing a water clean up company
After a major leak, homeowners are often approached by several restoration companies within hours, and the quality of those companies varies more than most people expect. A few questions can sort the serious operators from the rest.
- Are they certified by the Institute of Inspection, Cleaning and Restoration Certification (IICRC) for water damage restoration?
- Will they provide a written scope of work with line-item costs before starting?
- Do they use moisture meters to document drying progress, and will they share the readings with you and your adjuster?
- Do they handle the insurance paperwork, or are you expected to chase documentation yourself?
- Can they give you references from similar jobs in your area?
Be cautious of any company that pressures you to sign an assignment of benefits — an agreement that lets the contractor collect from your insurer directly — without giving you time to read it. These arrangements can be legitimate, but they also shift control of the claim away from you, and they have been the subject of consumer-protection warnings in several U.S. states after storm events.
Health considerations during and after water clean up
Most short, clean-water events are not a serious health hazard once the area is dried and cleaned. Longer or contaminated events are a different story. People with asthma, allergies, compromised immune systems, or pregnancy should be especially cautious around any area that has had visible mold growth or sewer contamination. Children, who breathe more air per pound of body weight than adults, are also more sensitive to indoor air-quality problems.
Practical precautions during the work itself include wearing gloves, an N95 respirator, and protective eyewear when handling wet materials, especially in a basement or crawl space. The CDC’s mold resources recommend keeping occupied rooms well ventilated during drying and continuing to run the dehumidifier for several days after the equipment is removed, because the last bit of moisture leaves the slowest.
Avoiding the next water clean up
Most residential water damage is preventable. The Insurance Information Institute has repeatedly found that water and freezing claims are among the most common — and most expensive — homeowners’ losses in the United States, frequently outpacing fire and theft in both frequency and average cost. A short list of habits, checked once or twice a year, removes a large share of the risk.
- Replace washing-machine, dishwasher, and ice-maker hoses every five to seven years, or sooner if they show bulging or rust.
- Install braided stainless-steel lines on toilets, sinks, and appliances rather than relying on rubber hoses.
- Test your main water shutoff valve once a year so it does not seize when you need it.
- Clean the sump pump pit and test the pump before the rainy season; consider a battery backup if your area loses power during storms.
- Know the location of every angle stop under sinks, behind toilets, and near water-using appliances.
- Keep gutters clear and grade the soil around the foundation so it slopes away from the house.
- Check the water-heater pan drain and the area beneath the heater for any sign of slow leaks.
None of these steps eliminate risk, but together they convert a surprising number of “emergency” water clean up jobs into the kind of small, contained leaks that a homeowner can mop up with towels and a fan.
A simple checklist for the first 24 hours
When water is on the floor, it helps to have a written sequence rather than relying on memory. Use the following list as a starting point, and adapt it to your home.
- Make the area safe: power off, slip hazards cleared, protective gear on.
- Stop the source or contain it if you cannot fully stop it.
- Document everything with photos, video, and notes.
- Notify your insurance company or your agent.
- Extract standing water with a pump or wet vac.
- Remove soaked carpet, padding, and any wet insulation.
- Set up air movers and a dehumidifier in the affected area.
- Clean and disinfect hard surfaces once drying is underway.
- Check moisture readings daily until framing and subfloor return to normal levels.
- Decide which materials can be saved and which need to be replaced.
If at any point the scope looks larger than a single room, the water is contaminated, or mold is already visible, bring in a certified restoration company. The cost of professional water clean up is almost always lower than the cost of tearing out a moldy basement a few months later.
When to call a professional right away
Some situations are not good candidates for a do-it-yourself approach. Call a restoration company as your first call — before even notifying insurance in some cases — if any of the following apply:
- The water is Category 2 or 3, or you are not sure which category it is.
- More than one room is affected, or water has reached a basement, crawl space, or shared wall with a neighbor.
- Water has been standing for more than about 24 hours.
- You see or smell mold, or members of the household are having new respiratory symptoms.
- The source involves the main sewer line, a water heater, or any system that connects to a gas or electrical appliance.
- You are not comfortable working around wet electrical, HVAC, or structural systems.
Restoration crews work around the clock in most U.S. metro areas, and most will meet you on-site within a few hours for an emergency. The faster the response, the lower the eventual cost, which is why a quick search for a local, IICRC-certified water damage company is worth doing before you ever need one.
Frequently asked questions
How long does water clean up usually take?
A small, clean-water event handled promptly can be dried and cleaned in three to five days, with repairs on top of that. Larger jobs involving multiple rooms, contaminated water, or hidden moisture often run one to three weeks for drying alone, followed by reconstruction.
Can I just let the room air out instead of using a dehumidifier?
Sometimes, if the affected area is tiny and the weather is warm and dry. In most U.S. homes, however, indoor humidity stays high enough that passive drying is too slow to prevent mold. A dehumidifier, ideally paired with air movers, is the reliable approach.
Is water clean up covered by homeowner’s insurance?
Most standard policies cover sudden and accidental water damage, such as a burst pipe or an appliance hose failure, but they exclude damage from long-term leaks, groundwater seepage, and (without a special rider) sewer backups. Reading your policy’s water-damage section is the only way to know for sure what is in and what is out.
Do I need to replace drywall after a leak?
Drywall that has been wet for less than about 24 hours, and that dried out without visible swelling, sagging, or mold, can sometimes be saved. Anything that stayed wet longer, that shows a waterline, or that crumbled when touched should be cut out and replaced. Most professionals cut at least 12 inches above the highest visible waterline.
What is the difference between water clean up and mold remediation?
Water clean up is the process of removing water, drying the structure, and cleaning or removing damaged materials. Mold remediation is the separate, more controlled process of dealing with mold growth that has already taken hold. Mold work often requires containment, negative air pressure, and disposal of contaminated material, and it is done after the moisture problem is fixed.
Can I stay in the house while water clean up is happening?
Often yes, especially for a contained Category 1 event in a single room. You will want to keep children and pets away from the equipment and from any contaminated area. For larger jobs, especially Category 3 events, it is common to relocate temporarily, and additional living expenses are typically covered by insurance in that case.
How do I know if the drying is really done?
Use a moisture meter, not just how the room feels. A professional target for framing and subfloor is to bring readings back to within a few percentage points of the unaffected areas of the house. Visual dryness is not enough; the last bit of moisture hides inside materials that look fine on the surface.
Are cleaning products like bleach enough to disinfect after a leak?
For hard, non-porous surfaces affected by clean water, household cleaners are fine. For gray or black water, an EPA-registered disinfectant used according to the label is a stronger choice, and porous materials should usually be discarded rather than treated in place.
Will a wet carpet always have to be torn out?
Not always. A small, clean-water spill that is extracted within hours and dried quickly can often be saved, especially if the padding is replaced and the subfloor is dried from below. Carpet soaked by contaminated water, or by clean water left for more than a day or two, is almost always removed along with the padding.
What is the single most useful thing a homeowner can do during water clean up?
Document the damage thoroughly and respond quickly. Photos, videos, and receipts speed up the insurance process, and a fast response — stopping the source, extracting water, and starting drying the same day — is the variable that most affects both the final bill and the chance of avoiding mold.