
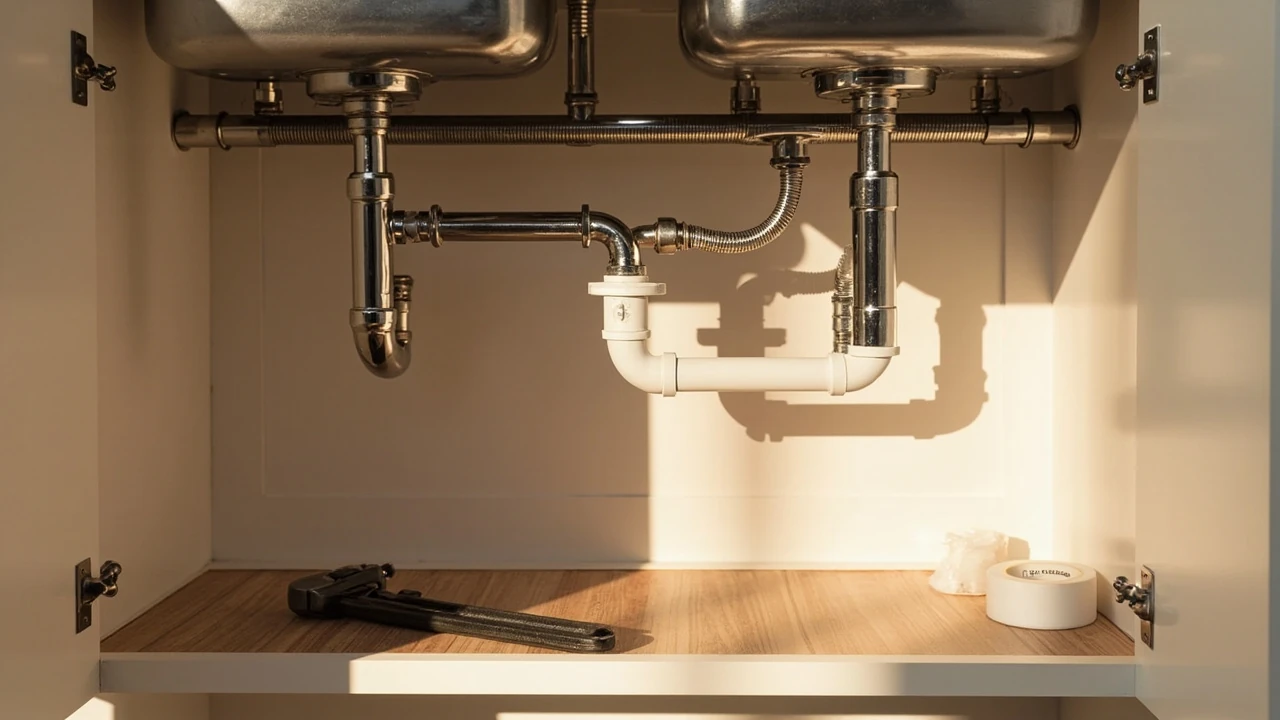

Proper kitchen sink plumbing diagram: what every homeowner should understand
When a kitchen sink backs up, leaks under the cabinet, or starts gurgling when the dishwasher drains, most homeowners reach for a plunger or a bottle of drain cleaner. What they really need is a clear mental picture of the pipes hidden behind the wall and below the basin. A proper kitchen sink plumbing diagram turns that hidden network into a readable map, so you can describe the problem, plan a remodel, or talk to a plumber with confidence instead of guesswork.
This guide walks through what a correct residential kitchen sink drain and supply layout looks like, why each part exists, and the decisions that determine whether the system works for years or develops chronic odors and slow drains. The focus is on the typical single- or double-basin setup found in U.S. homes, not specialty bar sinks or commercial prep sinks.
Why a diagram matters more than a parts list
Plumbing under a kitchen sink looks simple: a few chrome pipes, a couple of valves, maybe a white plastic hose. In practice, every fitting exists for a specific reason, and changing one without understanding the rest can create new problems. A diagram is useful because it shows relationships: which pipe carries wastewater, which carries air, and which carries fresh water in. Once those roles are visible, most of the “mystery” of under-sink plumbing disappears.
Three subsystems usually appear in any proper kitchen sink plumbing diagram:
- The drain, waste, and vent (DWV) system that moves used water out and admits air to keep the trap working.
- The hot and cold water supply lines, usually 3/8-inch or 1/2-inch, that feed the faucet.
- The appliance branches for a dishwasher, instant hot water dispenser, or water filter, where present.
Each of these is governed by a mix of physics, manufacturer instructions, and local plumbing code, which is why a homeowner-friendly diagram is more valuable than a generic photo of pipes.
Main components in a standard under-sink layout
Before reading any diagram, it helps to know the parts by name. The table below lists the parts a homeowner is most likely to see, what each one does, and the most common materials in modern U.S. kitchens.
| Component | Function | Typical residential material |
|---|---|---|
| Tailpiece | Vertical pipe from the basket strainer to the trap | Chrome brass or white PVC |
| P-trap | U-shaped trap that holds a water seal to block sewer gas | Chrome brass, PVC, or ABS |
| Trap arm | Horizontal pipe from the P-trap to the wall or floor drain | Chrome brass or PVC |
| Sanitary tee | Fitting that joins the trap arm to the vertical stack | PVC or ABS |
| Vent pipe (DWV) | Carries air in and out of the drain system | PVC or cast iron |
| Shutoff valves | Isolate hot and cold supply lines for service | Brass with chrome or plastic handle |
| Supply lines | Flexible tubes from valves to faucet inlet | Braided stainless steel or polymer |
| Dishwasher drain hose | Carries dishwasher discharge into the drain | Reinforced rubber or polymer |
| Air gap or high loop | Prevents dirty dishwasher water from siphoning back | Plastic air gap fitting or hose loop |
Not every kitchen has every component. For example, older homes may have cast iron stacks and brass traps, while newer homes often use PVC throughout. A diagram is still useful because the logical arrangement is the same.
The drain, waste, and vent side of the diagram
When you look at a proper kitchen sink plumbing diagram from the side, the drain side looks like a lowercase “J” attached to a larger vertical pipe inside the wall. The basin outlet drops into a tailpiece, the tailpiece feeds the P-trap, the P-trap connects to a horizontal trap arm, and the trap arm ties into a sanitary tee on the stack.
Each fitting has a job that goes beyond simply connecting two pipes:
- The P-trap holds a permanent water seal, usually 2 to 4 inches deep, that blocks sewer gas from rising into the kitchen. If the sink is unused for a long time, the water can evaporate and allow odors in, which is why rarely used sinks smell musty.
- The trap arm must slope gently downward toward the stack, typically about a quarter inch per foot. If it is flat or back-pitched, water and food waste sit in the arm and cause slow drains.
- The vent portion of the stack allows air behind the draining water so the P-trap is not siphoned dry. Without venting, a large slug of water can create suction that pulls the trap seal out, leaving the kitchen exposed to sewer gas.
Many older homes use a single shared vent for the kitchen sink and the adjacent bathroom. Newer homes often re-vent each fixture individually back to a vent stack through the roof. The diagram should show whether the kitchen ties into a wet vent (a vent that also serves as a drain) or a dry vent (a vent that only carries air), because that changes how the system behaves when multiple fixtures run at once.
Water supply lines and shutoff valves
On the supply side, the diagram is much simpler. Two pipes enter the cabinet from the wall or floor: one hot, one cold. Each pipe ends in a shutoff valve, and from each valve a flexible supply line rises to the corresponding inlet on the faucet.
The materials matter more than the layout. The two most common supply line types in modern kitchens are braided stainless steel and polymer-braided lines. Both are rated for the pressures and temperatures found under a kitchen sink, but they are not interchangeable in every situation, and old chrome corrugated lines should be replaced during any kitchen remodel.
Three practical points often show up on a proper diagram:
- Hot is always on the left, cold on the right, matching standard faucet markings. Reversed lines will not damage the faucet, but mixing up hot and cold at the supply can confuse anyone who later works on the plumbing.
- Shutoff valves should be quarter-turn ball valves rather than multi-turn stop valves. Ball valves open and close reliably even after years of disuse, which is helpful in an emergency.
- Compression fittings on the supply lines should be hand-tight plus a small turn with a wrench. Over-tightening can crack the valve body or the faucet inlet.
How a dishwasher, filter, or hot water tap fits into the diagram
Most modern kitchen plumbing diagrams include at least one appliance branch. The two most common are a dishwasher drain and an instant hot water dispenser. A water filter or reverse osmosis system may add a small tee and a dedicated faucet, but those do not change the main drain layout.
The dishwasher drain is the part that causes the most confusion. In a typical installation, the dishwasher drain hose runs from the dishwasher up to a fitting on the sink tailpiece or on a dedicated small port on the disposer if one is present. The hose then drops back down to the dishwasher. This high loop, or an actual air gap fitting mounted on the sink or countertop, is required to prevent wastewater from siphoning back into the dishwasher.
A simple comparison helps clarify the options:
| Method | How it works | Where it is common | Trade-offs |
|---|---|---|---|
| High loop on drain hose | Hose is fastened as high as possible under the sink, usually to the underside of the countertop | Many U.S. jurisdictions, especially where an air gap is not required | Simple, no extra fitting, but depends on correct installation |
| Air gap fitting | Small chrome cylinder on the sink or countertop; hose enters and exits through it | California and a handful of other code jurisdictions | More reliable anti-siphon protection, but adds a visible fitting and two extra hose connections |
| Direct connection to disposer | Dishwasher hose clamps to a port on the side of the disposer | Common when a garbage disposer is installed | Convenient, but the disposer must be wired and plumbed correctly and the knock-out plug removed |
Homeowners should check local code for which method is required, because the difference is not just cosmetic. The wrong setup can allow contaminated water to flow back into the dishwasher and, in the worst case, onto clean dishes.
Reading a proper kitchen sink plumbing diagram from top to bottom
Plumbing For additional context, diagrams are usually drawn in two views: a plan view from above and an isometric or side view that shows vertical relationships. To make sense of either, it helps to read in a consistent order. The list below walks through a typical single-basin, no-disposer installation in the order water actually moves.
- Water enters the faucet through the hot and cold supply lines from the shutoff valves.
- Used water exits through the basket strainer in the basin floor into the tailpiece.
- The tailpiece carries the water down to the inlet of the P-trap.
- The P-trap fills partially with water, holding a seal against sewer gas, and the rest of the water flows through the trap arm.
- The trap arm slopes down to a sanitary tee on the main drain stack inside the wall.
- From the sanitary tee, waste drops through the stack to the building drain, while the upper portion of the stack continues up as a vent through the roof.
Once that order is clear, almost any variation on the diagram makes sense. Adding a disposer, a second basin, or an instant hot tap simply adds parallel paths that rejoin at the same trap and stack.
Common mistakes diagrams help prevent
Most under-sink problems are not mysterious. They fall into a small set of patterns that show up again and again in service calls, and almost all of them are easier to prevent than to fix later. A clear diagram helps spot each one before a wall is closed or a cabinet is reinstalled.
- S-traps installed in place of P-traps. An S-trap forms an “S” below the sink and can siphon itself dry, which is why most U.S. plumbing codes require a P-trap with a separately vented trap arm.
- Flat or back-pitched trap arms. Without a consistent quarter-inch-per-foot slope, food debris sits in the arm and the sink drains slowly even when the trap is clear.
- Undersized vents. A vent that is too small or blocked can let trap seals get pulled during heavy use, allowing sewer gas into the kitchen.
- Flexible accordion-style trap assemblies. These are common in older homes and can clog easily, and many inspectors will ask for them to be replaced with rigid piping during a remodel.
- Dishwasher drain hose without a high loop or air gap. The dishwasher will drain fine, but there is nothing to stop wastewater from flowing back into the appliance.
For a closer look at how a real diagram of these elements can be drawn and labeled, this kitchen sink plumbing diagram guide from Mokher Plumbing shows the typical parts and their relationships in a modern residential installation.
Plumbing code considerations homeowners should know
The Uniform Plumbing Code and the International Plumbing Code, both used in various U.S. jurisdictions, lay out specific rules that any proper kitchen sink plumbing diagram has to follow. The exact wording varies, but the intent is consistent: protect the water supply, protect the dwelling from sewer gas, and make sure waste flows downhill without relying on pumps.
For a typical kitchen sink, the most relevant code points are:
- Trap size. Kitchen sink traps are usually 1.5 inches in diameter for a single basin or 1.5 inches shared for a double basin. Commercial-style prep sinks sometimes require 2-inch traps.
- Trap seal depth. Codes set a minimum and maximum water seal depth to prevent both evaporation siphoning and slow draining.
- Vent sizing and length. The vent serving a kitchen sink typically must be at least 1.25 inches in diameter, with limitations on how far the trap arm can run before re-venting.
- Cleanouts. A cleanout is often required on the trap arm or on the stack near the kitchen, so a cable can be run without disassembling the trap.
- Air gap or high loop for dishwashers. The exact requirement depends on jurisdiction, but the principle of preventing backflow is universal.
These rules are a starting point. Local amendments often add detail, which is why a permit and an inspection are worth the time for any work beyond swapping a faucet or replacing a supply line.
Planning a remodel or new install around the diagram
For a homeowner planning a kitchen remodel, the diagram is a planning tool as much as a reference. Once the main lines are drawn, several layout decisions become much easier to evaluate. Moving a sink to a new island, for example, may require running a new vent and tying into the building drain at a different location, which affects both cost and feasibility.
Some choices that are obvious on paper but often overlooked in the field include:
- Cabinet depth. A standard 24-inch deep sink base can usually fit a disposer, P-trap, and supply lines. A 21-inch cabinet often needs a low-profile disposer or a shallow trap to fit everything without crushing the pipes against the back wall.
- Outlet location. If the drain enters the wall, the trap arm is short and the layout is simple. If the drain exits through the floor, the trap must drop further, which can be a problem in tight cabinets.
- Access panels. Diagrams that show a large trap with slip joints look tidy on paper, but if the cabinet is full of cleaning supplies, real access can be limited. Leaving a clear path to the trap arm and shutoff valves is worth doing during rough-in, not after the cabinets are installed.
For homeowners thinking about broader renovation decisions alongside the plumbing, it can help to see how these systems interact with other parts of the home. An overview of a bathroom remodel guide for U.S. homeowners illustrates the same kind of supply-and-drain thinking applied to a different room, and is a useful reference when comparing fixture layouts across spaces. For questions that go beyond plumbing and into the structure of the home, the principles behind foundation repair planning for homeowners are a reminder that the visible parts of a kitchen sit on top of a system that has to move together.
Tools and materials for working from a diagram
A correct diagram is only useful if the parts called out on it are actually available, and if the person using the diagram has the right tools. The list below covers the most common items, in roughly the order a homeowner is likely to need them for a small repair or a planned remodel.
- Adjustable wrench and basin wrench for supply line and faucet work.
- Slip-joint pliers, sometimes called water pump pliers, for working on the P-trap and slip joints.
- Bucket, towels, and a wet-dry vacuum for catching residual water when the trap is opened.
- Replacement P-trap kit in the same diameter as the existing trap, usually 1.5 inches.
- New supply lines and shutoff valves if the existing ones are older than the rest of the plumbing.
- Teflon tape or pipe dope for threaded connections, used only where the fitting instructions call for it.
- A flashlight or headlamp, because most under-sink work happens in a cabinet with poor lighting.
None of these tools is exotic, and most are already in a basic homeowner toolkit. The bigger challenge is usually access and patience, not skill.
When to call a licensed plumber
Plenty of under-sink tasks are well within reach for a careful homeowner: replacing a P-trap, swapping supply lines, installing a new faucet, or adding a high loop to a dishwasher drain. Some situations, though, are worth handing off to a licensed professional, especially because plumbing errors can cause hidden water damage or health hazards that do not show up right away.
It is usually time to call a plumber when the work involves any of the following:
- Modifying or extending the drain, waste, or vent system inside walls or floors.
- Tying into the main building drain or stack, including adding a cleanout.
- Moving the kitchen sink to a new location, such as an island.
- Diagnosing persistent sewer gas odors, slow drains in multiple fixtures, or gurgling that points to a venting problem.
- Installing a gas-fired instant hot water dispenser, which involves both water and gas connections.
A good rule of thumb is that anything visible and accessible under the cabinet is fair game, while anything behind a finished wall, under a slab, or above the ceiling belongs to the pros.
Frequently asked questions
What does a proper kitchen sink plumbing diagram include?
A proper diagram shows the drain, waste, and vent piping from the basket strainer to the stack, the hot and cold supply lines from the shutoff valves to the faucet, and any appliance branches such as a dishwasher drain or instant hot water tap. It also shows fittings like the P-trap, sanitary tee, and vent connection, with arrows or labels to indicate the direction of flow.
What is the difference between a P-trap and an S-trap on a kitchen sink?
A P-trap is a U-shaped trap that connects to a horizontal trap arm which is then vented. An S-trap loops below the sink and connects directly to a drain that goes down without a separate vent. S-traps can siphon themselves dry, which is why most current U.S. plumbing codes require a P-trap with a properly vented trap arm for kitchen sinks.
How big should the drain pipe be for a residential kitchen sink?
For most single- and double-basin residential kitchen sinks, the trap and trap arm are 1.5 inches in diameter. Larger or commercial-style prep sinks sometimes use a 2-inch drain. The size shown on the diagram should match the fixture’s drain outlet and the building drain it ties into.
Do I need a vent for a kitchen sink?
Yes. Every plumbing fixture with a trap needs a vent to keep the trap seal from being siphoned out by draining water. In a proper kitchen sink plumbing diagram, the vent is shown as the upper portion of the drain stack, either running up through the roof or tying back into a larger vent pipe in the wall.
Is a dishwasher air gap required by code?
Some jurisdictions, including California, require a separate air gap fitting for the dishwasher drain. Many other U.S. jurisdictions allow a high loop on the drain hose as long as it is fastened as high as possible under the countertop. The local plumbing code, not the dishwasher manual, is the final word on which method is required.
Can I install a garbage disposer on any kitchen sink?
In most cases yes, as long as the sink basin has a standard 3.5-inch drain opening and the electrical circuit under the sink can handle the disposer. The plumbing diagram changes slightly: the dishwasher drain hose now clamps to a port on the disposer instead of to the sink tailpiece, and the disposer outlet becomes the new tailpiece.
What slope should the drain pipe under the kitchen sink have?
The horizontal trap arm should slope downward toward the stack at about a quarter inch per foot. A flat or back-pitched trap arm is one of the most common causes of slow drains under a kitchen sink, even when the rest of the plumbing is correct.
Why does my kitchen sink smell like sewage even though it drains fine?
The most common cause is a dry or partially siphoned P-trap. That can happen if the sink is rarely used, if a vent problem is pulling the trap seal out, or if the trap is cracked and leaking. Running water into the sink for a minute often clears the odor temporarily; a persistent smell points to a vent or trap issue that the diagram can help diagnose.
Are flexible accordion-style drain pipes acceptable under a kitchen sink?
Most inspectors and current code guidance discourage them because they trap debris in the ridges and can clog more easily than smooth rigid pipe. During a remodel, these are usually replaced with a standard PVC or brass P-trap assembly. A proper diagram always shows a rigid, smooth trap.
Where should the dishwasher drain hose connect in a proper kitchen sink plumbing diagram?
It should connect either to a port on the garbage disposer (with the knock-out plug removed) or to a dedicated inlet on the sink tailpiece or drain tee, and then run up to a high point before dropping back down to the dishwasher, or through an air gap fitting if one is required locally. The connection should be downstream of the P-trap so the dishwasher is not discharging into the trap itself.