
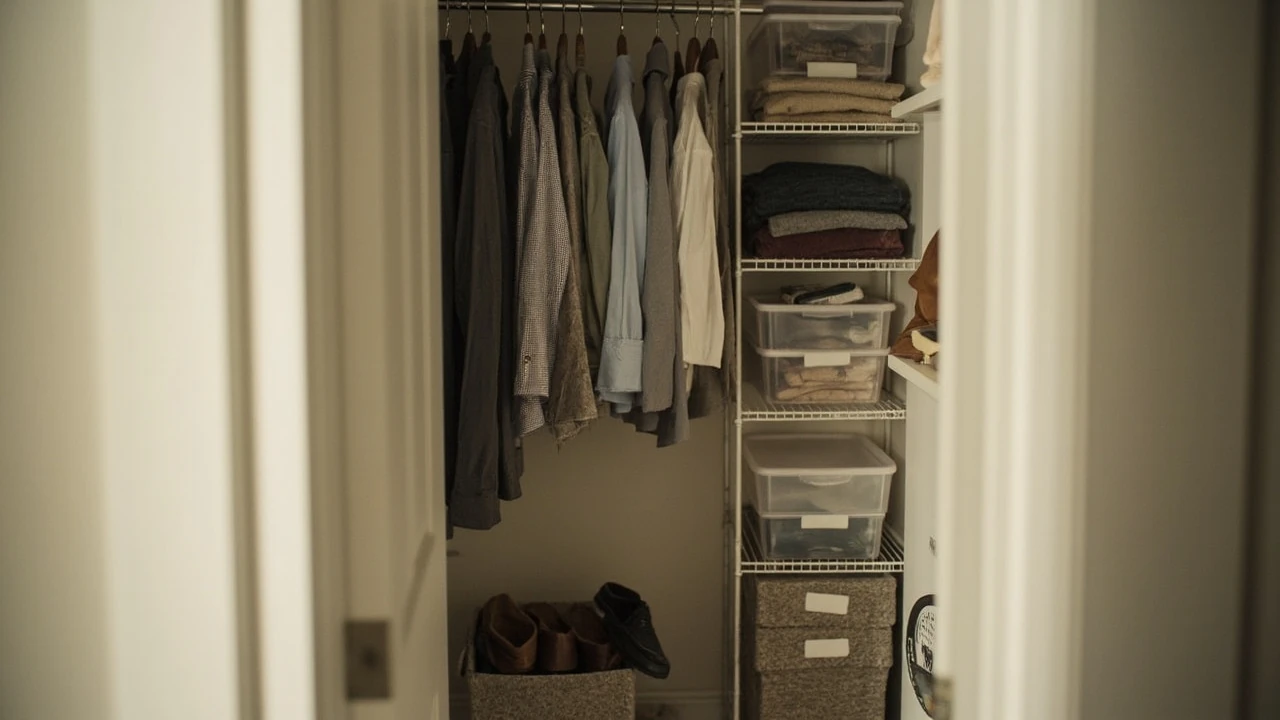

How to organize a small closet without rebuilding it
A reach-in closet that measures about 5 feet wide and 2 feet deep can feel hopeless the moment a second person’s wardrobe lands on the same rod. Clothes slide into a single jammed row, shoes pile on the floor, and the top shelf becomes a graveyard for things nobody can reach without a step stool. The fix is rarely a bigger closet. It is a tighter decision about what stays, a clearer plan for how each category of item will be stored, and a small set of tools that match the actual dimensions of the space.
Closet organizers tend to get the most value when the work happens in this order: empty the space, sort everything into keep and release piles, measure the inside of the closet, then choose a system that fits those numbers rather than the inspiration photo. That sequence keeps the project from turning into a Pinterest loop and ending with parts that do not actually fit between the walls. It also makes it easier to keep the closet organized afterward, because every shelf and hook has a job that matches the items you actually own.
Step 1: empty the closet and sort every item
The first move is to take everything out. Bags, shoes, boxes, the orphaned iron, the gift-wrapping paper that migrated in two years ago. Spread the contents on the bed or the floor so you can see the real volume of what is being stored. Once the closet is empty, vacuum the floor and walls, wipe the rod, and check the corners for the lint and dust that build up behind long-hanging items.
Sorting works best in three piles rather than two. A keep pile is for items worn in the last 12 months and that still fit. A repair pile is for items with a missing button, a broken zipper, or a hem that has been waiting six months. A release pile is everything else. A simple rule of thumb used by many professional organizers is that if an item has not been worn in a year and is not a formal piece for a specific event, it should leave the closet. That rule is not a moral judgment; it just reflects how often people actually reach for their most-worn pieces.
When the piles are ready, move the repair items to a visible spot so the work actually gets done, and move the release items out of the room the same day. Bagging them for donation and leaving the bag by the front door removes the option of quietly sliding items back into the closet later.
Step 2: measure the closet before buying anything
A small closet that feels impossible usually has more usable space than people think, but only if the storage is matched to the actual dimensions. Measure three things:
- The width of the back wall, inside the trim, from left to right.
- The depth of the closet from the back wall to the front edge of the door opening.
- The height from the floor to the ceiling, and from the existing rod to the ceiling above it.
Write the numbers on a piece of paper and photograph them in place. Most modular systems, including popular options sold at home improvement stores, list their dimensions in inches, so having the closet in inches avoids conversion mistakes at the store. If the closet has a single builder-grade shelf and rod, also note the height of that rod, because it usually sits lower than is useful and is the first thing many people raise or replace.
While the tape measure is out, look at three details that affect every decision that comes next:
- The door type. A hinged door uses the door swing as storage space. A bi-fold door limits access to the front of the closet. A sliding door restricts the opening width but leaves the side walls free.
- Obstructions. Ductwork, electrical panels, attic access panels, and window placements all take real estate away from the layout.
- Adjacent outlets and lighting. If the closet does not have a light, a battery-powered puck light on the ceiling is a small upgrade that pays off every morning.
Step 3: pick a system that matches the closet, not the photo
The most common mistake when learning how to organize a small closet is to start with a beautiful image and try to reverse-engineer the closet to match it. The cleaner approach is the opposite. Decide what categories of items the closet needs to hold, then choose a system that supports them.
Most small closets need to store a mix of the following categories. The exact mix is personal, but the framework is similar across homes:
| Category | Best storage method | Where it usually fits |
|---|---|---|
| Long dresses, coats, suits | Hanging, full length | Tall vertical section, 60 inches or more of clear rod space |
| Shirts, blouses, pants | Hanging on slim hangers | Double-hang rod, one above the other |
| Sweaters, jeans, activewear | Folded on shelves | Mid-level shelves within easy reach |
| Shoes | Rack, cubbies, or clear boxes | Floor level, or a shallow shelf at the front of the closet |
| Bags, scarves, belts | Hooks, divided trays, or scarf hangers | Side walls or the inside of the door |
| Off-season items, luggage, board games | Bins on the top shelf | Top shelf, the hardest area to reach daily |
Once the categories are set, the storage system choice becomes much simpler. A few options tend to work well for small closets:
- Modular wire systems with a top track and adjustable brackets. These install in an afternoon, can be reconfigured when needs change, and are usually the most affordable option per inch of usable storage.
- Wood closet systems that combine a top shelf, a double hang, and side cubbies. These look more finished and tend to hold up longer, but they cost more and usually need a careful measurement check before ordering.
- Standalone furniture such as a narrow dresser, a cube organizer, or a small bookcase placed under the hanging rod. This is a good option for renters who cannot drill into the walls.
- Over-the-door and wall-mounted accessories such as hooks, pocket organizers, and tiered shoe racks. These add capacity without taking floor space.
For a deeper walkthrough of one homeowner’s small-closet project, including how they measured, what categories they planned for, and what their final layout looked like, the post on Just a Girl and Her Blog shows the whole process in detail.
Step 4: install the core layout in the right order
Installation goes faster if the pieces go up in a deliberate order. A layout that works in most small closets, and that can be adapted for either a modular system or a standalone setup, follows this sequence:
- Mount the top track or attach the top shelf first. This sets the level for everything below it. Use a level on the track and check the front edge as well as the back, because a track that looks flat from the side can still be tilted toward the back wall.
- Install the side supports or vertical strips. These carry most of the load, so the anchors should match the wall type. Drywall anchors work in most homes, but plaster, concrete, or brick behind the drywall may need a different anchor or a different screw.
- Hang the upper rod at a height that leaves room for a lower rod beneath it. A common double-hang arrangement places the upper rod around 80 inches from the floor and the lower rod around 40 inches, which gives enough room for shirts on the lower rod and longer items on the upper rod at one end.
- Add the shelves, then the shoe storage, then the small accessories last. The order matters because adding a shelf usually requires emptying the rod below it.
If the closet is shared, the same layout can be split into two sides, with one person taking the longer hang section for dresses or suits and the other taking the double-hang section for shirts and pants. Splitting access like this avoids the daily argument about who crowded the rod.
Step 5: put clothes back in the right place
The way items return to the closet is what decides whether the system holds up a month later. A few habits make a real difference.
- Group by category, not by color. Hanging all shirts together and all pants together makes it easier to see what is actually owned and to put away laundry quickly.
- Use slim, matching hangers. Velvet hangers take up about a third less rod space than plastic or wood hangers, which often doubles the capacity of a single rod.
- Keep everyday items at eye level and at arm reach. Special-occasion pieces and off-season storage can go on the top shelf and the back corners, where they are out of the way but still accessible once or twice a year.
- Fold knits and stretch fabrics rather than hanging them. Knit shoulders stretch out under their own weight, which is why a shelf of folded sweaters lasts longer than a rod of stretched sweater shoulders.
The basic organization map below works for most small closets after the system is installed.
| Zone | What goes there | Why |
|---|---|---|
| Top shelf | Off-season storage, luggage, bins labeled with contents | Out of the daily path, still reachable with a small step stool |
| Eye level, long hang | Dresses, coats, suits, anything that needs full length | Prevents wrinkling at the hem and keeps special items visible |
| Eye level, double hang | Shirts on top, pants or skirts below | Maximizes the vertical space between the upper and lower rods |
| Lower shelf | Folded knits, jeans, purses in dust bags | Easy to see, easy to put away, no bending required |
| Floor and front edge | Shoe rack or clear shoe boxes | Keeps dust off shoes and stops the floor pile from forming |
| Door and side walls | Hooks for bags, scarves, and belts; small caddies for accessories | Uses space that would otherwise be empty |
Each zone works as a “home” for a specific category. When a shirt lands on a hook instead of the shirt rod, it becomes obvious during the next tidy-up that the system has a small hole that needs to be addressed.
Step 6: deal with shoes, bags, and accessories
Accessories tend to be the part of the closet that gets out of hand fastest, because each piece is small and easy to set down “for now.” A few targeted fixes usually solve most of the problem.
- Shoes: A two-tier floor rack fits under most hanging clothes and holds about six to eight pairs in a small footprint. For larger collections, clear stackable boxes let shoes stack vertically without crushing each other and let the owner see what is inside without opening every box.
- Bags: Handbags hold their shape best when they are stored upright on a shelf, ideally with a small piece of acid-free tissue inside each one. If shelf space is tight, a row of wall hooks near the door holds daily bags within reach of the bedroom.
- Scarves and belts: A dedicated scarf hanger with notched loops keeps scarves from sliding into a single clump on one end of a hanger, which is the common failure point of the popular shower-ring trick. Belt hooks on a side wall or a slim drawer insert keeps belts flat instead of rolled.
- Jewelry: A small hanging jewelry organizer on the inside of the door, or a divided tray on the top shelf, stops tangles and makes morning routines faster.
Step 7: maintain the system with a 10-minute weekly reset
An organized closet drifts back toward clutter at the rate of one returned item left in the wrong place. The simplest defense is a short weekly reset. Once a week, take ten minutes to:
- Hang any item that landed on a shelf or the floor back on the correct rod.
- Fold anything that was tossed on top of a shelf into the actual pile.
- Pull any item that did not get worn during the week into a small “reconsider” box. If the item stays in the box for a month, it has earned its way out of the closet.
This is also a good time to do a quick wipe-down of the shelves and to check that no item has migrated in front of another. The reset is short on purpose, because a longer weekly task tends to be skipped within a month.
Common mistakes when organizing a small closet
Most small-closet projects run into the same handful of issues. Spotting them early is much cheaper than rebuilding a system a year later.
- Buying the system before measuring. The classic case is a wire system that is two inches wider than the opening, which forces a return trip to the store and leaves a small gap on one side that collects dust.
- Ignoring the door swing. Hinged doors and sliding doors create very different access patterns. A layout that looks great in a sliding-door closet will be blocked by the door in a hinged-door closet.
- Forgetting about lighting. A dark closet hides the things that are hardest to maintain, which is one reason shelves end up overflowing. A simple battery light or a hardwired LED strip on the ceiling fixes the problem for a small cost.
- Skipping labels. Clear bins on the top shelf look tidy but hide their contents. A strip of painter’s tape with a marker, or printed labels, lets everyone in the household return items to the right bin without guessing.
- Over-customizing the layout. A system that has twelve different zones for twelve categories of items is harder to keep organized than a system with five clear zones. The goal is fewer homes, each with a clear job, not a custom slot for every item.
Cost ranges and time expectations
The total cost of a small-closet project depends mostly on the type of system and whether the work is done by the homeowner or by a hired installer. The table below gives a rough sense of the range, based on common retail options in the U.S. and excluding any custom built-in cabinetry. Real prices change over time, so these should be treated as planning estimates rather than current quotes.
| Approach | Typical materials cost | Typical install time | Best for |
|---|---|---|---|
| Wall-mounted wire system, DIY | Low | Half a day to a full day | Renters, tight budgets, simple layouts |
| Wood closet system, DIY | Medium | One to two days | Homeowners who want a more finished look |
| Modular system, professional install | Medium to high | One day | Homeowners who want a guaranteed fit and no tool time |
| High | Several days to a week | Larger renovations and primary suites | |
| Standalone furniture under a rod | Low to medium | Less than an hour | Renters, temporary solutions, narrow closets |
The right choice is the one that matches the budget, the rental status of the home, and how long the current layout needs to last. A renter who plans to move in two years is usually better off with a freestanding setup than with a wall-mounted system that will need to be patched on the way out.
Renter-friendly options that do not damage walls
Closet organizing without drilling into walls is a real category, not a compromise. A few options that work in rentals:
- A freestanding garment rack combined with a narrow cube organizer for folded clothes. The rod carries the hanging items, and the cubes hold sweaters, jeans, and bins for accessories.
- Over-the-door hooks and pocket organizers. These hang from the top of the door and add useful storage for scarves, bags, and small accessories without any holes in the door or wall.
- Adhesive-mounted hooks and small shelves. Modern removable adhesives hold a surprising amount of weight on painted drywall, and they come off cleanly when warmed with a hair dryer. They are not appropriate for heavy items like full tool storage, but they are reliable for belts, bags, and lightweight accessories.
- Floor-standing shoe racks that fit under the hanging rod. These keep shoes visible and off the floor without taking up useful hanging space.
The general rule for rentals is to keep heavy items low, where the floor is doing the work, and to keep wall-mounted pieces for the lightest accessories. This protects the wall finish and also keeps the setup easy to move.
Small-closet layouts that solve the most common complaints
Most of the time, the reason a small closet feels broken is one of three complaints. A different layout addresses each one.
Complaint: “I cannot fit all my clothes on the rod.”
The fix is almost always a double-hang rod. A single rod that runs the full height of the closet wastes the upper portion, where shirts and pants can hang comfortably on a second rod at about 40 inches above the floor. Doubling the rod space roughly doubles the number of items that can be hung in the same footprint, which is the most common reason people feel they need a bigger closet when they actually have plenty of room.
Complaint: “I cannot reach the top shelf.”
The fix is to move daily items down to the lower shelves and use the top shelf for off-season storage in clearly labeled bins. A small folding step stool stored on the closet floor or behind the door gives access when the bins need to come down, and removing the daily scramble for the top shelf is what makes the rest of the system feel easier to use.
Complaint: “My closet looks fine but I cannot find anything in the morning.”
The fix is category grouping and labels. Grouping by category rather than by color is faster to scan in the morning, because the eye is looking for “a shirt” rather than for a specific color. A small set of clear bins with printed labels on the top shelf solves the same problem for anything that is not hanging.
Frequently asked questions
How do I start learning how to organize a small closet if I have never done it before?
Begin by emptying the closet completely, then sort the contents into keep, repair, and release piles. Measure the inside of the closet in inches, decide which categories of items you need to store, and choose a system that fits those numbers and categories. The order matters: empty, sort, measure, plan, then install.
What is the cheapest way to organize a small closet?
The most affordable setup combines a freestanding garment rack, a small set of cube organizers for folded clothes, a tiered floor shoe rack, and a few labeled bins for the top shelf. None of these require drilling into walls, and they can be expanded or rearranged as the wardrobe changes.
Do I need to remove the existing builder-grade shelf and rod?
Not necessarily. Many small closets are improved simply by raising the existing rod to a more useful height, adding a second rod beneath it for a double-hang section, and adding a wire shelf above the new upper rod. The original shelf and rod can be left in place if they are still solid, or removed with a pry bar and a few screws if they block the new layout.
How many hangers do I need for a small closet?
A small closet with a double-hang section can usually hold between 60 and 90 slim hangers, depending on the width of the closet and the height of the two rods. The number matters less than the type: matching slim hangers use rod space more efficiently than a mix of plastic, wood, and wire hangers.
Where should I put shoes in a small closet?
Shoes belong at floor level on a rack or in clear boxes. A two-tier floor rack fits under most hanging clothes, and clear boxes stack vertically for larger collections. The goal is to keep shoes off the closet floor where they collect dust and to keep each pair visible so they are easy to grab in the morning.
Can I organize a small closet without drilling into the walls?
Yes. Freestanding garment racks, cube organizers, over-the-door hooks, adhesive-mounted hooks, and floor shoe racks all add storage without any holes. This is the right approach for renters and for anyone who plans to rearrange the closet within a year or two.
How do I keep a small closet organized once it is set up?
Schedule a short weekly reset of about ten minutes. Return any item that landed on a shelf or the floor to its proper zone, fold anything that was tossed onto a pile, and pull items that did not get worn during the week into a small reconsider box. A short, consistent habit is more effective than a long, occasional deep clean.
What is the best way to store sweaters in a small closet?
Fold sweaters and place them on a shelf rather than hanging them. Hanging stretches the shoulders out of shape over time, especially on knit fabrics. A small basket or bin on the shelf keeps the stack tidy and makes it easy to pull one sweater out without toppling the rest.
Should I share a small closet with another person?
Sharing a small closet works if the layout is split by zone, with one side for long-hang items and the other for double-hang, or one side for shirts and the other for pants. A short conversation about who is keeping what category of clothing in the shared space prevents the daily scramble for rod space.
How long does it take to organize a small closet from start to finish?
For most homeowners, the full project, including emptying, sorting, installing the system, and putting clothes back, takes a full day for a simple wire system and a weekend for a wood closet system. The actual install is usually faster than the sorting, which is the part that takes the most time and the most decisions.