
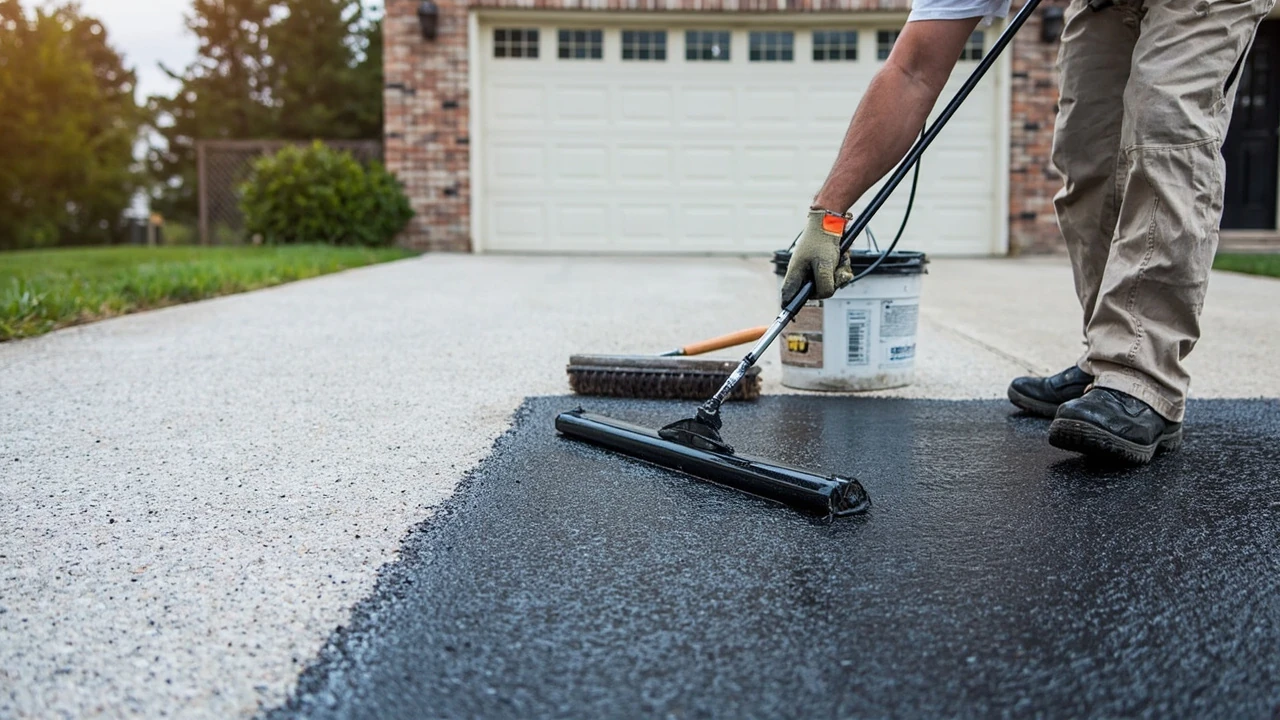

Seal coating driveway: what it actually does for your asphalt
A seal coating driveway treatment is a thin liquid layer applied over cured asphalt to slow oxidation, block water penetration, and resist the everyday stains that age a blacktop surface. Most homeowners reach for it when the driveway starts looking gray, dry, and rough, or when hairline cracks begin to show along the tire paths. The product does not repair structural damage and it will not fill wide gaps, but it does buy time against the two forces that destroy residential asphalt first: water seeping into the base and sunlight drying out the binder that holds the aggregate together.
Homeowners often confuse seal coating with resurfacing. Resurfacing adds a new layer of hot or cold asphalt over the old surface; seal coating only adds a protective film roughly the thickness of a few coats of paint. That distinction matters, because a badly cracked or sunken driveway needs structural work before any coating will help. A driveway that is still solid underfoot, drains well, and only shows surface wear is usually a good candidate.
Why a homeowner would schedule it at all
Asphalt is a mixture of crushed stone, sand, and a petroleum-based binder. That binder is what gives fresh pavement its dark, slightly flexible character. Over time, ultraviolet light and oxygen harden and shrink the binder, water works into the small voids left behind, and the surface slowly turns brittle. The first signs are color change, then raveling where small stones loosen, then cracks. A seal coat adds a sacrificial film on top so the binder underneath stays softer and the stones stay locked in place longer.
The seal coat also makes the surface easier to keep clean. Oil drips, leaf stains, and road salt sit on top of the coating instead of soaking into the pavement, so a rinse or a gentle cleaner is often enough to lift them. A darker, more even color also tends to read as “newer” from the curb, which is a fair practical reason to coat a driveway you plan to sell a home around.
When a driveway is ready for seal coating
Timing is the single biggest decision a homeowner makes. Seal coat the wrong surface and you will lock in problems; seal coat at the right moment and you can extend the life of the pavement by several years.
Age of the asphalt
New asphalt needs time to cure. The light oils that allow the mix to be placed and compacted must off-gas before a sealer will bond properly. Most residential contractors recommend waiting at least 6 to 12 months, and many prefer a full year on a sunny site. If you coat too early, the sealer can flake, blush, or peel because solvents are still migrating out of the pavement.
An older driveway that has never been sealed is a different question. The first coat goes onto a dry, gray, slightly porous surface and usually soaks in well. Plan on two coats on that first round: one penetrating coat and one finishing coat. After that, a single refresh coat every two to four years is usually enough for a typical residential driveway.
Visible condition
The driveway is usually ready for seal coating when you can answer yes to most of the following:
- Color has faded from near-black to medium gray or lighter
- Surface feels dry and slightly rough rather than smooth and slightly tacky on a hot day
- Sand or small stones come loose on shoe soles or in tire treads
- Hairline cracks are present but no wider than a quarter inch
- No standing puddles remain an hour after rain
If you see wide cracks, sunken areas near the garage or apron, or grass growing through the surface, those are base or drainage problems that need repair first. Sealing over them hides the symptoms for a season and usually makes the underlying damage worse.
Choosing a sealer type
Homeowners usually buy sealer in 5-gallon pails from a building supply store, or hire a contractor who brings commercial material in bulk. Both routes are reasonable, but the products are not interchangeable. Understanding the basic categories helps you compare options and read a spec sheet without guessing.
The common chemistry families
- Asphalt emulsion sealers. Water-based blends of asphalt, water, clay stabilizers, and often fine sand. They are the most common residential choice, low in odor, easy to apply, and clean up with water.
- Coal tar emulsion sealers. Once common, now restricted in some regions because of concerns about coal tar volatiles washing into storm drains. They are very fuel resistant and were long favored for commercial lots, but availability varies by state and municipality.
- Acrylic sealers. Pure or modified acrylic coatings, more often used on colored or decorative pavement. Higher cost, better color retention, and a different feel underfoot.
- Polymer-modified sealers. Asphalt or coal tar bases reinforced with polymers and sometimes fibers for added flexibility and durability. Most modern “premium” pails at retail are in this category.
Within those families, products are sold as “ready to use” or as concentrates that you add water, sand, and sometimes a latex modifier to. For a one-time residential job, a ready-to-use pail is the simplest path. For larger driveways, buying concentrate and mixing in a clean 5-gallon bucket saves money.
What to look for on the label
| Label item | Why it matters | What to prefer for a home driveway |
|---|---|---|
| Base chemistry | Determines odor, durability, and any regulatory limits in your area | Asphalt emulsion for most regions; check local rules if coal tar is on the shelf |
| Solids content | Higher solids mean more material left on the surface after water evaporates | At least 40 percent solids for a residential driveway |
| Sand content | Sand adds texture, slip resistance, and body to the film | Pre-mixed or add 1 to 2 pounds of silica sand per gallon for a driveway |
| Polymer modification | Improves flexibility and adhesion, especially on older, oxidized pavement | Helpful on driveways over 5 years old or with hairline cracking |
| Coverage rate | Tells you how many square feet a pail should cover at the recommended film thickness | Plan on 250 to 350 square feet per 5-gallon pail per coat on bare asphalt |
A spec sheet from a recognized pavement sealer manufacturer will spell out solids, sand load, and recommended coverage. Industrial and contractor-grade lines are the same chemistry you buy at retail, just in larger containers and with technical data that is easier to compare.
Climate, weather, and timing the application
Seal coating is fussy about weather. A pail of sealer that goes down perfectly in the morning can blush, streak, or wash off if conditions turn against you. The good news is that most regions have a long enough window each year to handle a residential driveway without rushing.
Temperature
Both the air and the pavement need to be warm enough for the water in the sealer to evaporate at a reasonable rate and for the film to coalesce. Aim for daytime highs between 60 and 90 degrees Fahrenheit. Below 50 degrees the sealer stays soft and never fully cures; above 95 degrees it can flash off too quickly, leaving brush marks and a brittle film.
Moisture and rain
The driveway must be dry before you start, and it needs to stay dry. Most products ask for at least 24 hours without rain after the final coat, and many contractors prefer 48. Morning dew counts as moisture, so starting late morning on a day that promises sun is safer than starting at dawn.
Sun and wind
Direct, intense sun on a freshly coated surface can cause premature surface drying and lap marks. A slightly overcast day is ideal. Wind dries the surface unevenly and can blow debris into the wet film, so a calm day or a wind-protected site is easier to work with.
Across much of the United States, late spring and early fall are the practical seal coating seasons. In hot southern climates, winter windows around mild stretches work, while in northern climates the work fits into late May through early October depending on the year. The local weather forecast, not the calendar, is the final word.
Tools and materials for a do-it-yourself driveway
You can seal coat a typical two-car residential driveway in a long day with two people and a basic kit. The tools are inexpensive and most can be rented.
- 5-gallon pails of sealer, calculated by coverage and number of coats
- Drill with a paddle mixer for blending the pail
- Push broom or stiff bristle brush for working sealer into the surface
- Wide rubber squeegee for spreading on smoother pavements
- Drum of clean silica sand if the sealer is not pre-sanded
- Pressure washer or stiff broom and garden hose for cleaning
- Crack filler appropriate for asphalt, applied and cured before sealing
- Painters tape and plastic sheeting to protect garage floors, walkways, and landscaping edges
- Old clothes, rubber gloves, and slip-resistant footwear; the sealer does not come off skin easily
For larger driveways, some homeowners rent a small sealer sprayer. Sprayers lay a uniform coat quickly but require careful masking, and rental machines need thorough cleaning before the sealer sets inside them. A squeegee and brush combo is slower but more forgiving on a first job.
Step-by-step: how seal coating a driveway works
Once the prep is done, the actual coating goes down faster than most first-timers expect. A careful sequence keeps the result clean and uniform.
Step 1: Clear and clean the surface
Move vehicles, planters, and any outdoor furniture off the driveway. Sweep thoroughly. A pressure washer on a low setting lifts embedded dirt, algae, and loose sand; let the driveway dry completely before moving on. Pay special attention to the edges near grass and the apron at the street, where dirt and organic matter tend to collect.
Step 2: Repair cracks and small defects
Hairline cracks under a quarter inch can be filled with a pourable crack filler designed for asphalt. Wider cracks and small potholes need a cold patch product, compacted firmly and allowed to cure according to the label. Any crack repair must be fully cured and dry before the sealer goes on, or the sealer will not bond over the patch.
Step 3: Treat oil spots
Oil penetrates asphalt and prevents sealer from sticking. Spot prime oily areas with the oil spot primer sold by most sealer manufacturers, or clean them with a degreaser and a stiff brush, rinse, and let dry. Skipping this step is the most common reason a fresh seal coat peels in the tire tracks.
Step 4: Mask and protect
Run a line of painters tape along the garage floor edge, the sidewalk, and any expansion joints you want to keep clean. Drape plastic over nearby walls, doors, and plants. Seal coat is not toxic, but it is messy and unsightly when it gets on concrete.
Step 5: Mix the sealer
Stir the pail thoroughly with a paddle mixer. If you are adding sand for slip resistance, blend it in slowly until the mixture is uniform. If the label calls for water, add only the amount listed; over-diluting weakens the film.
Step 6: Apply the first coat
Pour a ribbon of sealer along one edge of the driveway. Work the sealer into the surface with a squeegee or brush using long, even strokes, pulling excess material toward the unfinished area. Keep a wet edge and avoid stopping in the middle of a pass. On a textured or older surface, a brush works the sealer into the pores; on smoother pavement, a squeegee lays a more uniform film.
Step 7: Apply the second coat
Once the first coat is dry to the touch and able to handle light foot traffic, apply the second coat perpendicular to the first. Two thin coats outperform one thick coat; thick films stay soft, track under tires, and can crack as they shrink.
Step 8: Block the driveway
Keep vehicles off the surface for at least 24 hours, and longer in cool or humid weather. Foot traffic can usually return once the surface is dry to the touch and no longer tacky.
Common seal coating mistakes
Most failed seal coat jobs trace back to a small set of predictable errors. Knowing them in advance makes it easier to plan around them.
- Coating too soon after installation. A fresh driveway needs months of cure time.
- Coating over damp pavement. Trapped moisture causes whitening and poor adhesion.
- Skipping oil spot primer. Tire path peeling usually starts here.
- Applying one heavy coat instead of two thin ones. Thick films crack and track.
- Sealing over wide cracks or base failures. The sealer is not a structural repair.
- Working in direct midday sun on hot pavement. The film skins over before it levels.
- Driving on the surface before it has fully cured. Tire marks and depressions lock in.
A driveway that was sealed in a hurry often looks acceptable for a few weeks and then fails in patches, usually along the edges and tire paths. Most of those failures can be corrected the following season with a proper prep and two new coats.
Seal coating a driveway versus hiring it out
Doing the work yourself saves labor cost but adds time, planning, and physical effort. Hiring a contractor trades money for speed and experience. The right answer depends on the size of the driveway, your comfort with the work, and how you weigh your time.
| Factor | DIY approach | Professional application |
|---|---|---|
| Material cost for a 600 sq ft driveway | Two to four 5-gallon pails of sealer, plus sand and supplies | Often similar material cost, rolled into the quote |
| Labor | One or two homeowners over a long day plus prep and cure time | Two or three crew members finishing in a few hours |
| Equipment | Basic hand tools, possibly a rented sprayer | Commercial squeegees, brushes, and sometimes tank sprayers |
| Surface prep | Homeowner decides how thorough to be | Often included; some contractors also handle minor crack repair |
| Warranty | None beyond product label | Many contractors offer a one- to two-year workmanship warranty |
| Risk of mistakes | Higher for a first job | Lower, but varies with crew experience |
When collecting quotes, ask whether the price includes cleaning, crack filling, and at least two coats. A low number that covers only one thin coat is rarely a good value. A clear scope and a list of references in your neighborhood are worth more than a small price difference.
How long a seal coat should last
Under typical residential conditions, a properly applied two-coat seal job holds up for two to four years before another coat is needed. Climate, traffic, and the original condition of the pavement all push that number up or down.
- Sunny, hot climates fade sealers faster and may need refreshing every two to three years.
- Shaded driveways in mild climates often go three to four years between coats.
- Heavy vehicle traffic, sharp turning at the garage, and snowplow use shorten the life of any seal coat.
- Use of harsh de-icers can break down the film faster than the asphalt underneath.
A practical inspection each spring, looking for color fade and any raveling, is the easiest way to time the next round. Waiting until the surface looks tired again is fine; sealing “just in case” every year tends to build up a thick, soft layer that tracks and scuffs.
Cost expectations for a residential driveway
Costs move with region, season, and fuel prices, so a single number will be wrong somewhere. The ranges below are intended as planning estimates for a typical U.S. home in 2026, not as quotes.
| Approach | Typical two-coat job on a 600 sq ft driveway | What usually drives the price |
|---|---|---|
| DIY materials only | Around one hundred to two hundred dollars in pails, sand, and supplies | Product tier, sand load, number of coats |
| Professional application | Often in the range of three hundred to seven hundred dollars for a two-car driveway | Region, prep work, crack repair, number of coats, access |
| Add-on repairs | Crack filling and small patches add modest per-linear-foot cost | Linear feet of cracks, severity of patches |
For larger driveways, costs scale roughly with area, but the per-square-foot price often drops because setup and travel are spread over more pavement. Get at least two written quotes that specify prep, materials, coats, and warranty terms before scheduling.
Environmental and safety notes
Modern asphalt emulsion sealers are water-based and contain little to no solvent. They are not hazardous in the way that old coal tar products were, but they are still not food. Standard precautions are enough for a homeowner job.
- Wear rubber gloves, long sleeves, and slip-resistant shoes. The sealer is hard to remove from skin and stains clothing permanently.
- Keep children and pets off the driveway until the surface is fully cured.
- Do not pour leftover sealer down a storm drain. Most municipalities accept dried pails with regular trash or list them as household hazardous waste; check locally.
- If your region restricts coal tar sealers, follow the local rules. Several states and cities have phased them out of retail sale.
For contractors and very large driveways, material safety data sheets from the manufacturer are the authoritative source for handling, storage, and disposal.
Working seal coating into a broader driveway care plan
Seal coating is one of the most visible parts of driveway maintenance, but it works best when paired with a few quieter habits.
- Keep the surface clean. A seasonal rinse clears pollen, leaves, and road salt that would otherwise sit on the film.
- Maintain the edges. Soil and grass creeping over the edges hold moisture against the asphalt and shorten its life.
- Watch the drainage. Standing water at the apron or near the garage is a sign of base problems that no seal coat can fix.
- Be careful with snow removal. Metal blades and aggressive plowing chew up seal coats; rubber edges and plastic shovels are gentler.
- Address cracks early. A small crack filled this year is much cheaper than a base repair in five years.
Treated this way, an asphalt driveway can easily last 20 years or more before any resurfacing is needed. The seal coat is the maintenance layer that keeps the small problems from growing into large ones.
Where to look for more detail
Most of the information above is general, and your own driveway may have quirks that change the plan. A useful next step is to read product pages from established pavement sealer manufacturers so you can compare actual specifications like solids content and coverage rates before you buy or hire. The way contractors and suppliers describe their materials is also a good way to learn the vocabulary you will see on a quote. For a broader view of the materials, chemistry, and history of sealcoating, the Wikipedia entry on sealcoat gives a useful overview, and a product page like SealMaster pavement sealers is a practical reference for the categories and spec sheets you will run into at a supply house.
If you want to go deeper, talk to two or three local contractors, ask for references in your area, and walk a job they have finished in the last year. A driveway that still looks dark and even after one or two winters is a better endorsement than any brochure.
Frequently asked questions
How long after a new asphalt driveway is installed can it be seal coated?
Most manufacturers and contractors recommend waiting at least 6 to 12 months, with a full year being a common preference. That window lets the light oils in the mix evaporate so the sealer can bond to a stable, cured surface. Sealing too early can lead to peeling, blushing, or a soft film that never fully hardens.
Can seal coating fill cracks in a driveway?
No. Sealer is a thin surface coating, not a structural filler. Hairline cracks should be cleaned and filled with a compatible asphalt crack filler before the sealer goes on, and wider cracks need a proper patching material. A seal coat will only hide very fine lines and will not bridge gaps that have already opened up.
How many coats of sealer does a residential driveway need?
Two coats is the standard recommendation. The first coat penetrates and primes the surface, especially on older, oxidized asphalt. The second coat lays down a uniform protective film. On a brand-new, well-cured driveway, a single coat may be acceptable for the first round, but most contractors still prefer two thin coats over one thick one.
What is the best time of year to seal coat a driveway?
Late spring through early fall is the most reliable window in most of the United States, with daytime temperatures between about 60 and 90 degrees Fahrenheit, no rain in the forecast for 24 to 48 hours, and a calm, ideally slightly overcast day. The exact window shifts north or south with the climate.
Is coal tar sealer still available for home use?
Availability varies by state and municipality. Several jurisdictions have restricted or banned coal tar sealers because of concerns about polycyclic aromatic hydrocarbons washing into waterways. Asphalt emulsion sealers are the most widely sold residential option, and many local building supply stores stock only that category.
How long before cars can drive on a freshly sealed driveway?
At least 24 hours in warm, dry weather, and longer if the temperature is cool or humidity is high. Some contractors recommend 48 hours to be safe. The sealer may feel dry on the surface and still be soft underneath, and early tire traffic can leave depressions and scuff marks that are hard to remove without recoating.
Do I need to seal a driveway that has never been sealed?
Not strictly, but doing the first coat on a still-sound driveway is usually the most cost-effective moment to start a maintenance program. Once the asphalt has oxidized and raveled, a sealer has less binder to bond to. Starting the first seal coat while the surface is still dark and intact makes each subsequent coat work harder.
Can seal coating be done over concrete?
No. Asphalt emulsion and coal tar sealers are formulated for bituminous pavement. They will not bond properly to concrete, and the film will quickly wear off. Concrete driveways use different sealers, usually based on acrylic or siloxane chemistry, applied with a different process.
What is the difference between seal coating and resurfacing?
Seal coating adds a thin protective layer, typically a few hundredths of an inch thick, on top of the existing asphalt. Resurfacing adds a new layer of asphalt, usually one to two inches thick, on top of the existing base. Sealing is routine maintenance; resurfacing is a structural renewal that addresses widespread surface failure. A driveway usually needs several seal coats between resurfacings.
How do I find a reliable seal coating contractor?
Ask neighbors with recently sealed driveways for names, get at least two written quotes that list prep work, materials, number of coats, and warranty, and check that the contractor carries general liability insurance. A local presence and references within the last year or two matter more than a flashy website or a low price.