
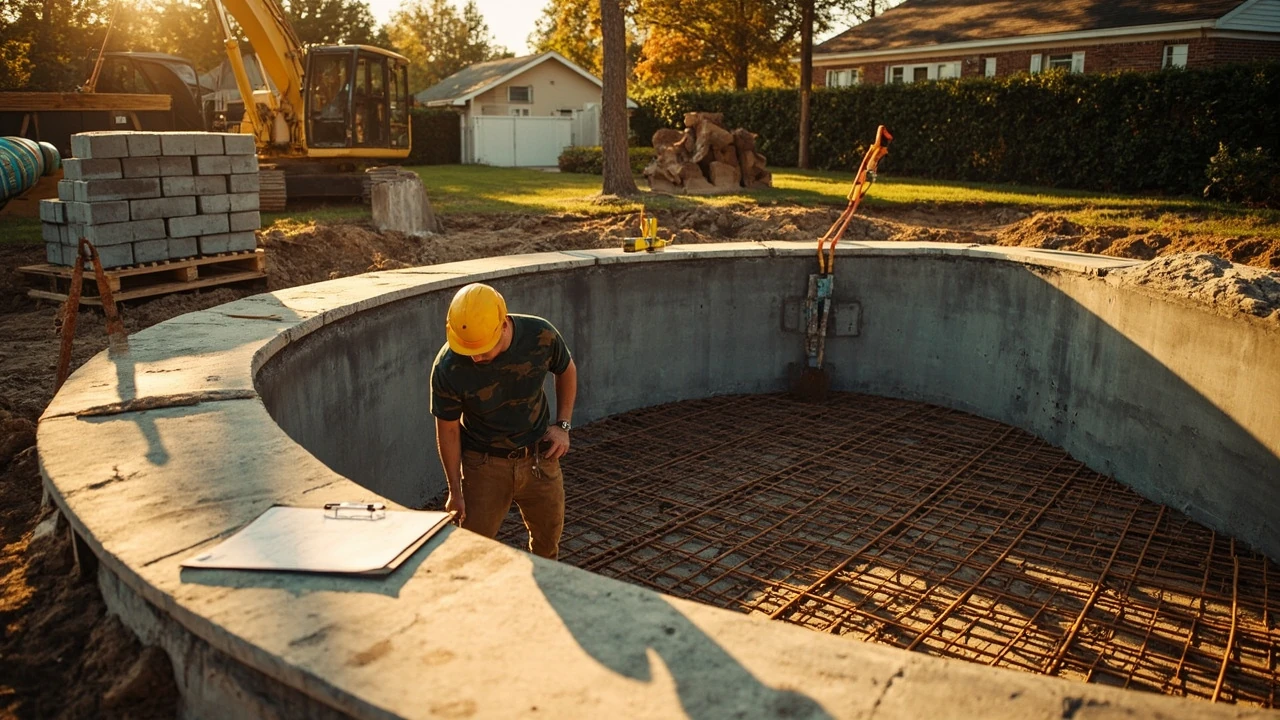

Swimming pool construction: what a U.S. homeowner should know before breaking ground
A backyard pool is one of the largest single improvements most U.S. homeowners will ever commission, and most of the regret that homeowners report later traces back to choices made in the first few weeks of swimming pool construction rather than to anything that happened during the dig. Pool builders routinely describe the moment a client chooses the cheapest shell, the smallest equipment pad, or the shortest plumbing run, and then lives with that compromise for decades. A careful, deliberate plan at the front end does not guarantee a perfect build, but it usually produces a pool that looks better, costs less to operate, and holds its value when the house eventually sells.
This guide walks through the decisions a typical U.S. homeowner faces during swimming pool construction, from the first budget conversation with a contractor to the final startup chemistry. It covers the main pool types, the realistic cost ranges a homeowner should plan for, the permitting and inspection steps that protect both safety and resale value, and the design choices that quietly drive operating costs for the next 20 years.
Decide why you want the pool before you pick a shape
Before any drawings are made, it helps to write down the primary reason the pool is being built. Most U.S. families want a pool for one of five reasons, and each reason points toward a different set of design choices.
- Family recreation and cooling off. A simple rectangular pool with a wide step, a shallow sun shelf, and a small deep end for occasional games fits most families who plan to use the pool after work and on weekends.
- Swimming laps for fitness. Lap pools need a long, narrow shape, a consistent depth of roughly 4 feet, and ideally a current or swim jet if the lot is too small for a 45- or 60-foot pool.
- Entertaining and aesthetics. Freeform pools, vanishing edges, raised spas, and elaborate lighting work well when the pool is meant to anchor an outdoor living area rather than to support active swimming.
- Resale value. In most U.S. markets, a simple, well-built rectangular pool in good condition adds more perceived value to a home than a custom showpiece with unusual features.
- Year-round use. A pool that needs to work in shoulder seasons benefits from a smaller surface area, a deeper profile, a high-efficiency heat pump, and an enclosure or cover that reduces overnight heat loss.
The reason the pool is being built shapes the size, depth, equipment, and finish. A pool designed for laps is a poor entertainment pool. A vanishing edge built purely for resale value is rarely worth the operating cost. Writing the reason down before a single salesperson visits the property keeps the project honest.
Choose the main pool type and shell material
Most U.S. residential swimming pool construction falls into three broad categories. Each has real tradeoffs in cost, design flexibility, build time, and long-term maintenance.
| Pool type | Typical build time | Design flexibility | Surface life expectancy | Best suited for |
|---|---|---|---|---|
| Concrete (gunite or shotcrete) | 8 to 14 weeks | Any shape, size, or depth | 15 to 25 years before resurfacing | Custom shapes, vanishing edges, very large pools, unusual lots |
| Vinyl liner over a steel or polymer wall | 4 to 8 weeks | Limited to standard shapes | 7 to 12 years per liner | Budget-driven projects, colder climates, soft-to-the-touch feel |
| Fiberglass one-piece shell | 2 to 4 weeks once excavated | Limited to manufacturer molds | 20 to 30 years with proper care | Tight timelines, owners who want the least acid washing and resurfacing |
Concrete pools are the most common choice for fully custom work because the shell is sprayed in place over a steel rebar cage. Vinyl liner pools are the most affordable and have softer surfaces, but the liner has to be replaced once or twice over the life of the pool. Fiberglass pools arrive on a truck, are set into a prepared hole, and have a factory-controlled surface that resists algae better than poured concrete, though the size and shape are limited to what the manufacturer offers.
For most U.S. homeowners, the choice comes down to a balance between cost, design freedom, and how long the project can run. A concrete pool can take three months from the first dig to a usable swim. A fiberglass pool can be swimming-ready in a week once the hole is ready, which matters for families with short summer seasons.
Budget honestly for the full project, not just the pool
The number most homeowners regret is the one that appears after the swimming pool construction contract is signed, when extras begin to show up on change orders. The visible pool is only part of the cost. Site work, fencing, decks, permits, and utility runs add up quickly, and most published cost guides only quote the shell and equipment.
| Cost category | What it usually covers | Common oversight |
|---|---|---|
| Design and engineering | Drawings, structural calcs, soil reports when required | Custom engineering is sometimes billed as an extra after the contract is signed |
| Excavation and site work | Access for equipment, haul-away of dirt, rough grading | Hidden rock, high water tables, or limited access that requires smaller machines and more labor |
| Shell and structure | Concrete, rebar, plaster, tile, or liner and walls | Upgrade finishes such as glass tile or pebble interiors added mid-project |
| Equipment pad | Pump, filter, heater, automation, salt cell or chlorinator | Undersized plumbing and pad space that has to be rebuilt later |
| Decking and coping | Concrete, pavers, travertine, or wood surrounds | Thin deck sections that crack in the first freeze-thaw cycle |
| Fencing and safety covers | Code-compliant barrier, gates, alarms | Pool-only fence ignored in the initial budget, then added late |
| Landscape restoration | Sod, plantings, irrigation repair | Construction damage to existing yard that the homeowner is expected to absorb |
| Utilities | Gas line for heater, electrical subpanel, water line upgrades | Distance from existing service that pushes the electrical run into major-trenching territory |
When requesting bids, it pays to ask each contractor to itemize these eight categories in the same format. A bid that looks lower because it leaves out fencing, decking, or utility runs is not actually a fair comparison. Homeowners who compare bids line by line usually end up with a more predictable final number and fewer surprises in the last month of swimming pool construction.
Permits, codes, and inspections that protect the project
Most U.S. jurisdictions treat a swimming pool as an accessory structure and require a building permit, electrical permit, plumbing permit, and sometimes a separate fence or barrier permit before any excavation begins. Skipping the permit work is rarely worth the savings. Unpermitted swimming pool construction can complicate the sale of the home, void parts of the homeowner’s insurance, and create real liability if someone is injured.
The typical sequence of inspections during a U.S. pool build is consistent enough that a homeowner can plan around it. Knowing the sequence also helps catch problems early, when they are still cheap to fix.
- Pre-construction layout. A surveyor or the building department verifies setbacks from property lines, easements, and any protected features such as septic fields or wetlands.
- Pre-gunite or pre-shell inspection. An inspector checks the steel rebar, plumbing rough-in, and bonding grid before concrete is sprayed or the liner walls are closed up.
- Equipment pad inspection. Electrical bonding, gas line pressure test, and plumbing connections to the pump, filter, and heater are checked before the equipment is put into service.
- Fence and barrier inspection. The pool barrier is checked for height, gate self-latching hardware, and the absence of climbable features within a defined zone.
- Final inspection. A walkthrough confirms that the pool, equipment, and barrier match the approved plans before the homeowner is allowed to fill and use the pool.
Codes vary by state and by county. In warm-climate states such as Arizona, Florida, and Texas, pool barrier rules are especially strict because of year-round use and the prevalence of young children visiting homes with pools. In colder states, the focus shifts to freeze protection for plumbing, equipment pad drainage, and deck detailing that can survive repeated freeze-thaw cycles.
How the actual build unfolds on site
Most homeowners only see the dramatic parts of swimming pool construction: the dig day and the first time the pool fills with water. The work between those two moments is the part that determines whether the pool will still look good in ten years. A typical build follows a clear sequence, and each step depends on the previous one being done correctly.
| Stage | What happens | What the homeowner should watch for |
|---|---|---|
| Layout and excavation | The shape is painted on the ground and dug to the design depth, with extra room for plumbing and forming | Marked utilities, staked setbacks, and a layout that respects existing trees and grading |
| Plumbing and steel | PVC suction and return lines are run, the rebar cage is tied, and the electrical bond grid is installed | Suction lines properly sized for the pump, skimmers and returns at correct heights, bonding wire continuous |
| Shell pour or set | Gunite or shotcrete is sprayed, or the fiberglass shell is craned into the hole and leveled | Even coverage with no soft spots, and the shell held to design depth |
| Cure and backfill | Concrete is kept wet to cure, then the area around the shell is backfilled and compacted in lifts | Slow cure, not a rushed plaster day; backfill compacted to prevent settling under the deck |
| Tile, coping, and deck | Waterline tile, pool-edge coping, and surrounding deck are installed | Expansion joints at the right places and slopes that shed water away from the pool |
| Interior finish and fill | Plaster, pebble, or quartz interior is applied, then the pool is filled without stopping | Continuous fill from a clean source so the surface cures against a single body of water |
| Startup and balance | Equipment is started, water is balanced, and the pool is brought to operating chemistry | A documented startup plan rather than a quick splash and hand-off |
Two of the most common quality problems in U.S. pool builds show up at this stage. The first is a backfill that is not properly compacted, which later causes the deck to settle and crack around the pool. The second is a startup that uses incorrect chemistry, which can permanently cloud a plaster finish. Both are easier to prevent during the build than to fix later, which is why a homeowner who understands the sequence is in a much better position to ask the right questions.
Equipment choices that quietly drive operating cost
The shell gets most of the attention during swimming pool construction, but the equipment pad is what the homeowner will interact with every week for the next two decades. The right equipment package is usually the most boring-looking one on the proposal: a variable-speed pump, a properly sized filter, a heater matched to the climate, and some form of automation. The wrong package looks attractive because it is cheaper up front, but it raises the monthly electric bill for as long as the pool exists.
A short checklist helps frame the equipment conversation with a builder.
- Pump. A variable-speed pump that can be programmed to run at lower speeds for most of the day will use a fraction of the electricity of a single-speed pump. Most U.S. utilities now require or strongly prefer variable-speed pumps on new pools.
- Filter. A large cartridge filter is easier to maintain than a sand filter for a typical backyard pool and produces better water clarity. A sand filter is a reasonable choice for very large pools or for owners who do not want to clean cartridges.
- Heater. A heat pump is the most efficient option in mild to warm climates. A gas heater is faster and is often paired with a heat pump for shoulder-season use. Solar heating is worth considering as a supplement in sunny regions.
- Sanitation. A salt chlorine generator trades the cost of buying chlorine for the cost of operating a salt cell and the periodic cell replacement. UV or ozone add-ons can reduce chemical demand but rarely replace chlorine entirely.
- Automation. A simple controller that runs the pump, heater, and light on a schedule pays for itself in energy savings within a few years and is far easier to live with than three separate time clocks.
- Plumbing. Oversized suction and return lines reduce pump workload. Valves that allow isolation of each skimmer and the main drain make future service much easier.
For most U.S. homeowners, the highest-impact equipment decision is the pump. The second is the heater, because heating a pool dominates the operating cost in any climate where the pool is used outside of summer.
Design choices that affect long-term satisfaction
Some design choices look like pure aesthetics during swimming pool construction but turn out to be practical decisions with long-term consequences. A few of the most important ones are worth thinking through before they are poured in place.
- Depth profile. A pool that is uniformly 5 to 6 feet deep is the most versatile for a mix of swimming, floating, and casual play. A diving pool needs at least 8 feet at the deep end, and the design has to be planned around that from the start.
- Steps and benches. A wide set of entry steps and a long bench along one wall make a pool safer for children, easier to use for older adults, and more comfortable for parents who spend a lot of time watching swimmers.
- Skimmers and main drain. Two skimmers are usually enough for a residential pool. The main drain should be plumbed to a separate, clearly labeled valve so it can be closed for service.
- Lighting. A single white pool light is the minimum. Adding a second light at the deep end, or switching to color LED lights, dramatically improves nighttime usability and safety.
- Cover. A solid safety cover that the homeowner can put on and take off in a few minutes pays for itself by reducing evaporation, keeping debris out, and preventing accidental drowning during the off-season.
These choices all look small on the bid, but they shape how the pool actually feels to use. A pool with a single light at the shallow end and no bench is workable. A pool with a deep-end light, a wide bench, and a real cover is genuinely pleasant to use, even on a weeknight in October.
How long the project should take, and what counts as a delay
Most U.S. swimming pool construction projects take between two and four months from the first dig to the first swim. The exact number depends on the pool type, the weather, the permitting office, and how busy the builder is at the time of contract. A homeowner who understands a realistic schedule is much better positioned to recognize a delay that signals a real problem rather than just a slow week.
A few general patterns are worth knowing. Concrete pools almost always take longer than fiberglass pools, both because the shell has to cure and because the interior finish needs the right weather to cure well. Vinyl liner pools are sensitive to the temperature at the time of liner installation, which can push a spring start into early summer. Heavy rain during excavation is one of the most common causes of real schedule slip, because digging in saturated soil damages the surrounding yard and can compromise the pool floor.
When a project falls behind, the first question to ask is whether the builder is waiting on a city inspection, on weather, on a custom-ordered component such as a heater or a fiberglass shell, or on labor. Each of those has a different fix. A homeowner who is paying attention to the schedule during the build usually catches the kind of quiet drift that ends up stretching a 10-week project into a 20-week one.
Common mistakes homeowners make during the build
The most expensive mistakes in U.S. swimming pool construction are almost always the result of decisions made quickly, not decisions made on a budget. A few patterns come up often enough to be worth naming.
- Sizing equipment to the lowest bid. A smaller pump, a cheaper filter, or a single-speed motor will run, but it will cost more to operate and will likely be replaced within a decade anyway.
- Skipping soil or geological review. In areas with clay soil, high water tables, or expansive bedrock, a soil test and a structural plan are not optional extras. They are the only way to avoid a pool that floats out of the ground or cracks within a few years.
- Choosing the finish on the spot. Plaster, quartz, and pebble interiors all look similar in a small sample. Their long-term feel, stain resistance, and lifespan are very different.
- Forgetting about drainage. A pool that sits at the lowest point of the yard will collect runoff every time it rains. Site grading and deck drains are part of the design, not an extra.
- Underestimating the deck. A narrow concrete deck around the pool looks elegant in a rendering and feels cramped the first time a family tries to use it. Eight to ten feet of usable deck behind the shallow end is a useful minimum for most families.
- Not planning for the utility run. The distance from the existing electrical panel to the equipment pad can turn a small part of the project into a major trenching job if it is not flagged early.
None of these mistakes are hidden. They are the things that experienced pool builders point out during the design phase. The challenge is that they are easy to wave off when the project is still a drawing and a budget number, and very expensive to fix once concrete is in the ground.
Vetting a pool builder before signing
Most U.S. homeowners choose a pool builder based on a referral from a friend or a neighbor, and that is a reasonable starting point. It is not a substitute for a careful vetting process before signing a contract. Swimming pool construction is one of the few home improvements where a single subcontractor is responsible for excavation, structural work, plumbing, electrical, tile, plaster, and startup, and there is no general contractor on top of the project to catch problems.
Before signing, a homeowner should verify a few items that protect both the project and the household.
- License and insurance. Confirm that the builder holds an active swimming pool contractor license in the state and carries both general liability and workers’ compensation insurance. Ask for the policy number and verify it with the insurer.
- References. Ask for the contact information of two or three customers whose pools are at least two years old, not just recently completed projects.
- Lien waivers. Make sure each draw or payment is paired with a lien waiver from any subcontractor who worked on the project during that period.
- Warranty in writing. Both the equipment manufacturer’s warranty and the builder’s structural warranty should be in the contract, with start dates and exclusions spelled out.
- Payment schedule. Standard U.S. pool contracts tie payments to specific milestones, not to calendar dates. A schedule that asks for a large deposit before excavation should be reviewed carefully.
- Subcontractor list. Knowing who will actually be on the property is useful for security and for the homeowner’s insurance carrier.
A reasonable builder welcomes these questions. A builder who pushes back on lien waivers, written warranties, or a milestone-based payment schedule is telling the homeowner something important about how the project will be run.
How a pool affects the rest of the yard and the home
It is easy to think of swimming pool construction as a standalone project. In practice, a pool reshapes how the rest of the yard and the back of the house work. Landscaping, irrigation, drainage, lighting, and even window placement all interact with the pool in ways that are not obvious until the project is finished. Planning for those interactions during the design phase prevents the most common complaint: a pool that does not really feel connected to the house.
A few practical design links are worth thinking through.
- Visual axis from the house. The most successful U.S. pools are usually visible from a main living space, with a clear line of sight from the kitchen or family room. That single decision has more impact on how often the pool is used than any equipment choice.
- Outdoor living space. A covered patio, a summer kitchen, or even a simple pergola next to the pool turns the pool from a feature into a destination and protects the deck from direct sun for part of the day.
- Landscape and shade. Some trees and planting are useful around a pool. Others drop leaves, stain finishes, or send roots into plumbing. Plant selection is part of the design, not an afterthought.
- Drainage and grading. The yard should slope gently away from the pool, with a clear path for deck drains and downspouts. A pool that sits in a low spot becomes a maintenance problem during every storm.
- Access and storage. A small equipment enclosure or shed for chemicals, toys, and tools makes the pool dramatically easier to live with.
Homeowners who treat the pool as part of a larger backyard project, rather than as an isolated hole in the ground, are usually happier with the result a year later. The pool is only one piece of an outdoor environment, and it works best when the rest of the environment has been planned around it.
When an existing yard already has the bones of a project
Not every U.S. pool build starts with bare dirt. Some properties already have an old pool that has been filled in, a slab that could be incorporated into a deck, or an outbuilding that could host the equipment pad. Each of these situations changes swimming pool construction in ways that are worth thinking through with a builder who has done similar work.
For example, an old filled-in pool sometimes leaves behind plumbing that is still connected to the sewer or to a deep well. A builder who has dealt with old pool fills will know what to look for and what permits are needed to either reconnect the old work or properly abandon it. The cost of either option is small compared to the cost of discovering the issue after the new shell is in place.
For projects that include a foundation repair conversation, the timing matters. If the home’s foundation needs work, it almost always makes sense to address that before the pool, because excavation for the pool can put new loads on the soil around the house and because heavy equipment on a wet yard can worsen an existing foundation problem. A pool builder who is not comfortable coordinating with a foundation contractor is not the right fit for that kind of project.
For projects where the pool is part of a larger indoor renovation, the same timing logic applies. It is far easier to coordinate a bathroom remodeling project, a new water service, or a tankless water heater upgrade while the equipment pad is being built than to revisit those decisions later.
A simple pre-construction checklist
Pulling the decisions in the rest of this page into a single list is useful for a homeowner who is early in the process and is not sure what to ask a builder yet. A short checklist keeps the early meetings productive.
- Define the primary purpose of the pool. Recreation, lap swimming, entertaining, resale, or year-round use.
- Set a realistic total budget. Include the shell, equipment, deck, fence, permits, and a contingency of 10 to 15 percent.
- Decide on the pool type. Concrete, vinyl liner, or fiberglass, based on design freedom, build time, and long-term surface care.
- Confirm the lot and the setbacks. Setbacks, easements, soil conditions, and access for excavation equipment.
- Pull the permits yourself or with the builder. Building, electrical, plumbing, and barrier permits as required by the local jurisdiction.
- Select the equipment package. Variable-speed pump, properly sized filter, matched heater, sanitation system, and basic automation.
- Plan the deck, lighting, and cover. Width, material, expansion joints, lighting layout, and a real safety cover.
- Vet the builder. License, insurance, references, written warranty, milestone payment schedule, and lien waivers.
- Plan for the rest of the yard. Grading, drainage, landscaping, outdoor living, and storage.
- Schedule the startup. A documented chemistry plan rather than a quick hand-off on the last day.
A homeowner who has thought through all ten items before the first design meeting will spend less money, get a more useful pool, and avoid the most common reasons that pool builds go sideways.
Frequently asked questions
How long does swimming pool construction usually take?
Most U.S. residential swimming pool construction projects take between two and four months from excavation to first swim. Concrete pools are usually at the longer end of that range, vinyl liner pools in the middle, and fiberglass pools at the shorter end. Permit timing, weather, and equipment availability can all add weeks.
What is the most expensive part of building a pool?
The shell, the excavation, and the deck together typically account for more than half of the total project cost. The equipment pad is usually a smaller share of the upfront cost but a much larger share of the lifetime operating cost. A pool owner who chooses the wrong equipment can pay the difference every month for the next 20 years.
Do I need a permit to build a pool?
Yes, in nearly every U.S. jurisdiction. A building permit is the most common, and most projects also need electrical and plumbing permits. Many cities and counties also require a separate barrier or fence permit. The builder usually pulls the permits, but the homeowner is responsible for making sure the work is inspected and approved before the pool is used.
Which pool type is best for a cold climate?
Vinyl liner and concrete pools both work in cold climates when the plumbing is properly winterized. Fiberglass pools are flexible and tolerate freeze-thaw cycles well. The more important decision in a cold climate is the equipment pad layout, with a focus on protected plumbing runs, a pad that drains away from the house, and a cover that keeps debris and snow out of the pool during the off-season.
How long does a vinyl liner last?
A residential vinyl liner typically lasts between 7 and 12 years, depending on water chemistry, sun exposure, and how well the pool is winterized. Liners in shaded pools with balanced water chemistry often last longer. Liners in sunny pools with unstable chemistry can fail in under five years.
How long does a concrete pool finish last?
A standard white plaster finish usually lasts between 7 and 10 years before it needs to be redone. A quartz or pebble aggregate finish typically lasts 15 to 25 years. The interior surface is the part of the pool that is most directly affected by water chemistry, so a homeowner who keeps the water properly balanced can extend the life of any interior finish by several years.
Should I build a pool for resale value?
It depends on the local market. In warm-climate regions where pools are expected, a well-built pool can support resale value. In cooler regions or in neighborhoods where pools are uncommon, a pool can narrow the field of buyers and lengthen the time a home spends on the market. A homeowner who is building primarily for resale should talk to a few local real estate agents before signing a contract.
What safety features are required for a residential pool?
Most U.S. jurisdictions require a four-sided barrier at least 48 inches tall, self-latching gates, and door alarms on any door that opens directly to the pool area. Many jurisdictions also require a safety cover if the pool is not enclosed. Local codes vary, so the homeowner should ask the builder for the specific requirements in their city or county before the equipment is ordered.
Can a pool be built on a small lot?
Yes, but the design has to work harder. Plunge pools, spool combinations, and lap pools with swim jets allow swimming pool construction on lots where a full-size pool would not fit. Setback rules still apply, and a smaller lot often means a smaller equipment pad, which has to be planned for at the same time as the pool itself.
What is the best time of year to start a pool build?
In most of the U.S., the best time to start a pool build is late winter or early spring, so the pool is ready to use by early summer. Starting in fall or early winter is possible in warm climates but can push the project into the wet season in some regions. Builders are usually less busy in late winter, which can also mean a more flexible schedule.